ProDVX GM-75 User Manual
Displayed below is the user manual for GM-75 by ProDVX which is a product in the Mounting Kits category. This manual has pages.
Related Manuals
ProDVX GM-75 Glass Mount
instruction manual
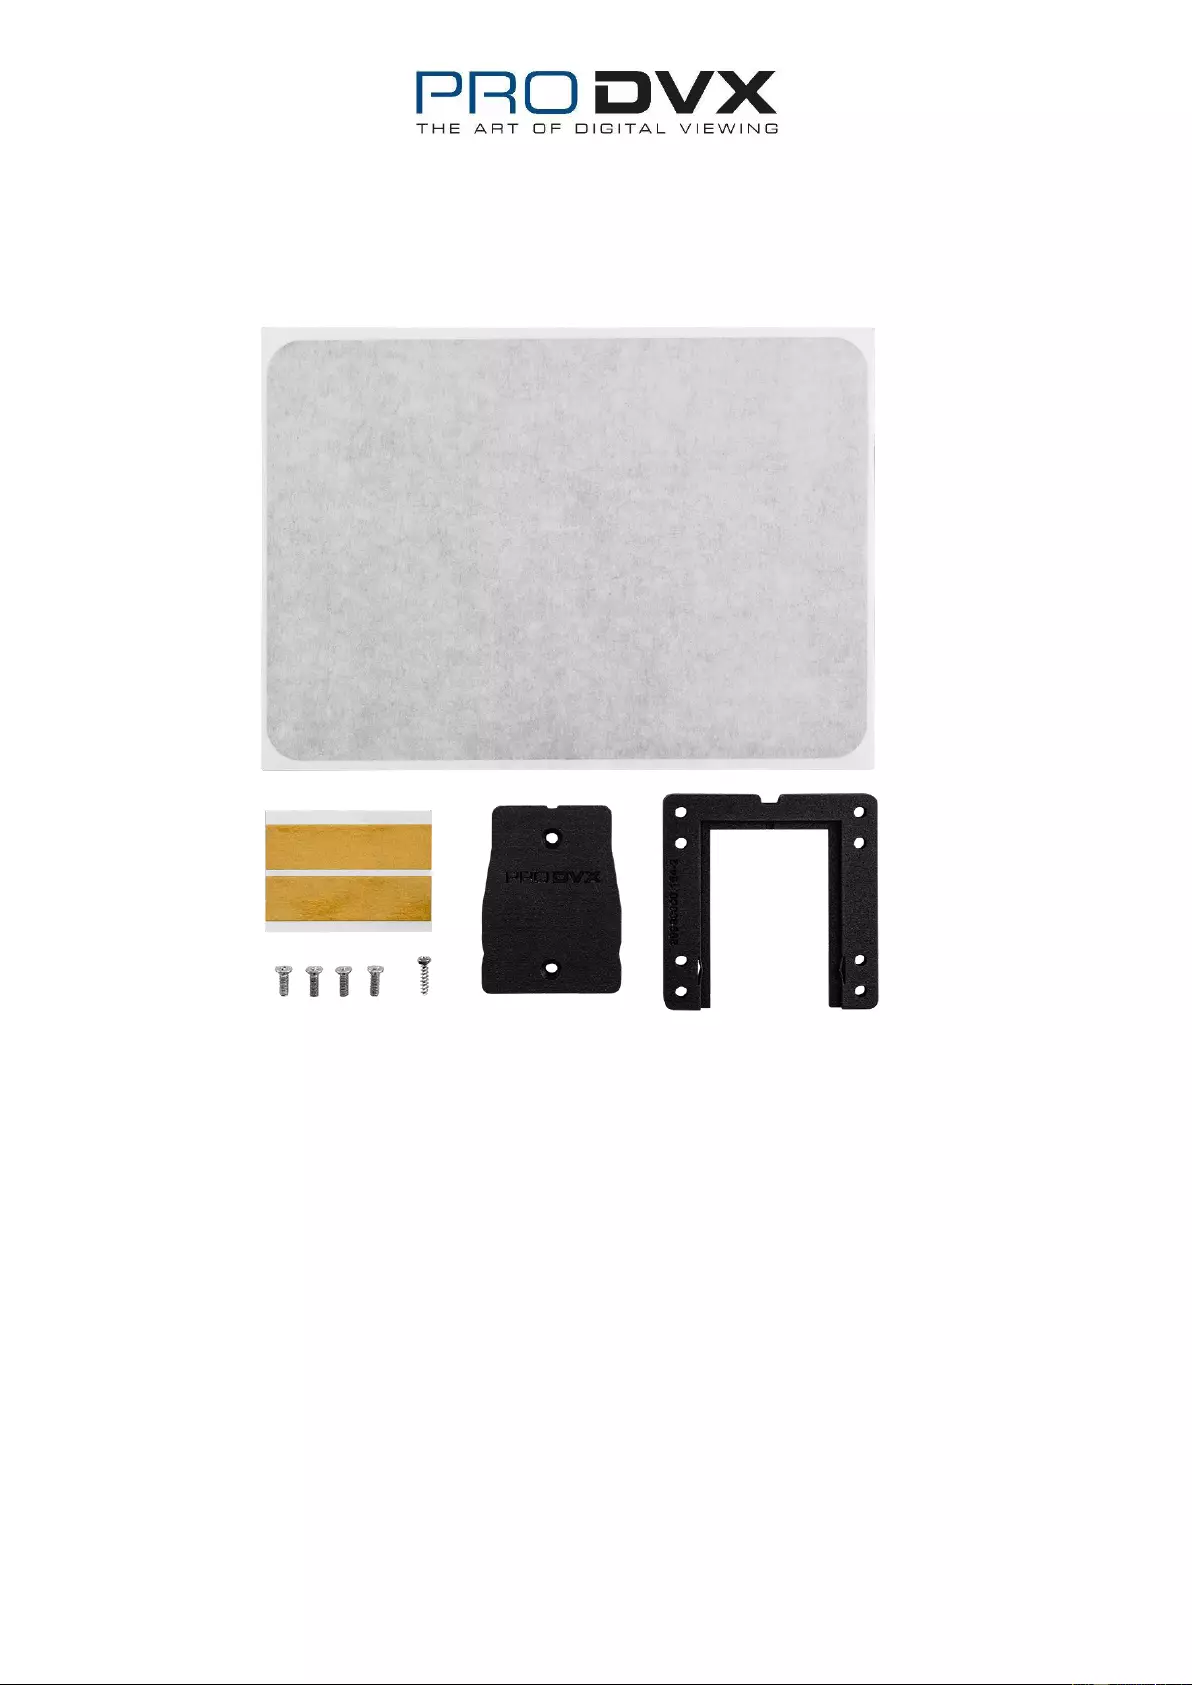
The ProDVX GM-75 Glass Mounts contains the following parts:
1 x 10” foil / sticker
1 x U-frame (8 x VESA holes)
1 x center block
1x sheet with 2 adhesive strips
4 x short VESA screws (M412)
1 x security screw (cross-recess)
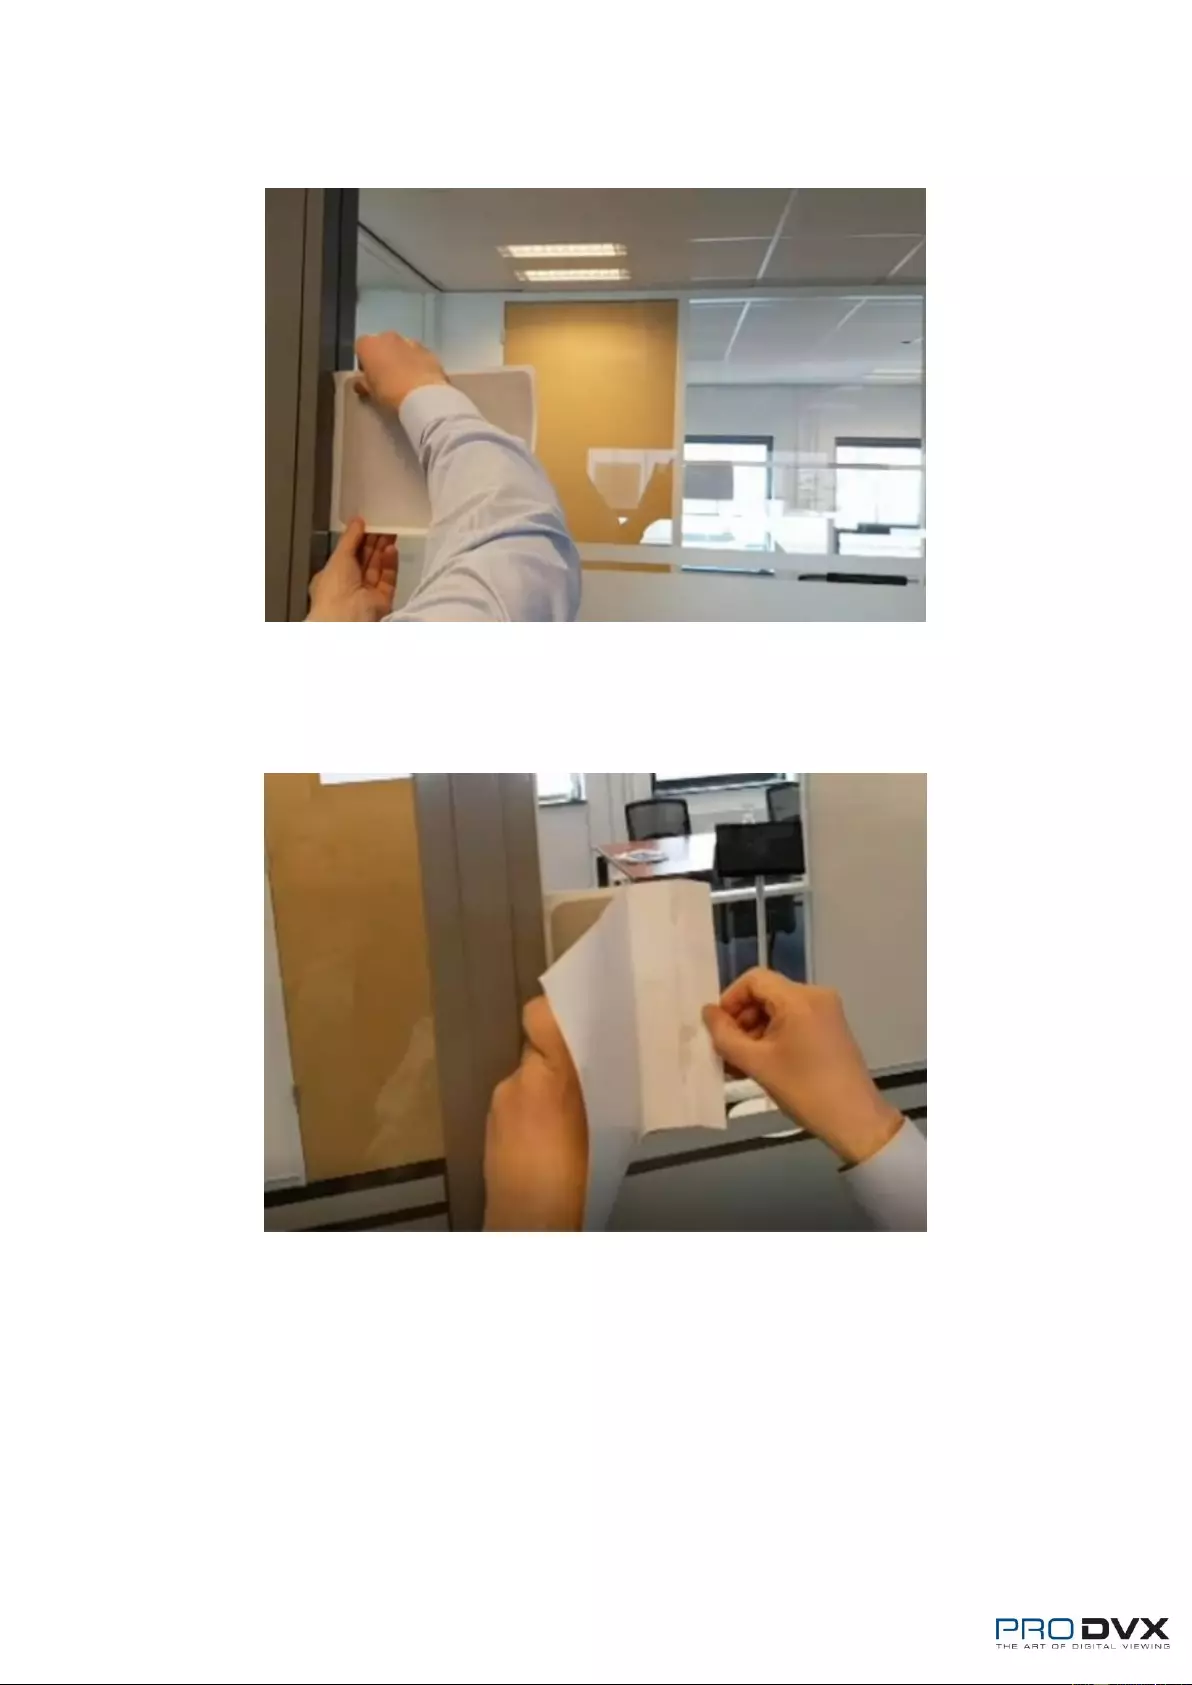
1) Clean the surface with Pro-Screen Cleaner spray
Place the foil with the desired size on the glass surface
2) Hold the foil on the left side and pull the backside paper out
3) Use a solid straight item to even out the foil
4) Even out big bubbles with the straight item
(little bubbles will disappear with time)
5) Gently pull down the paper from the frontside
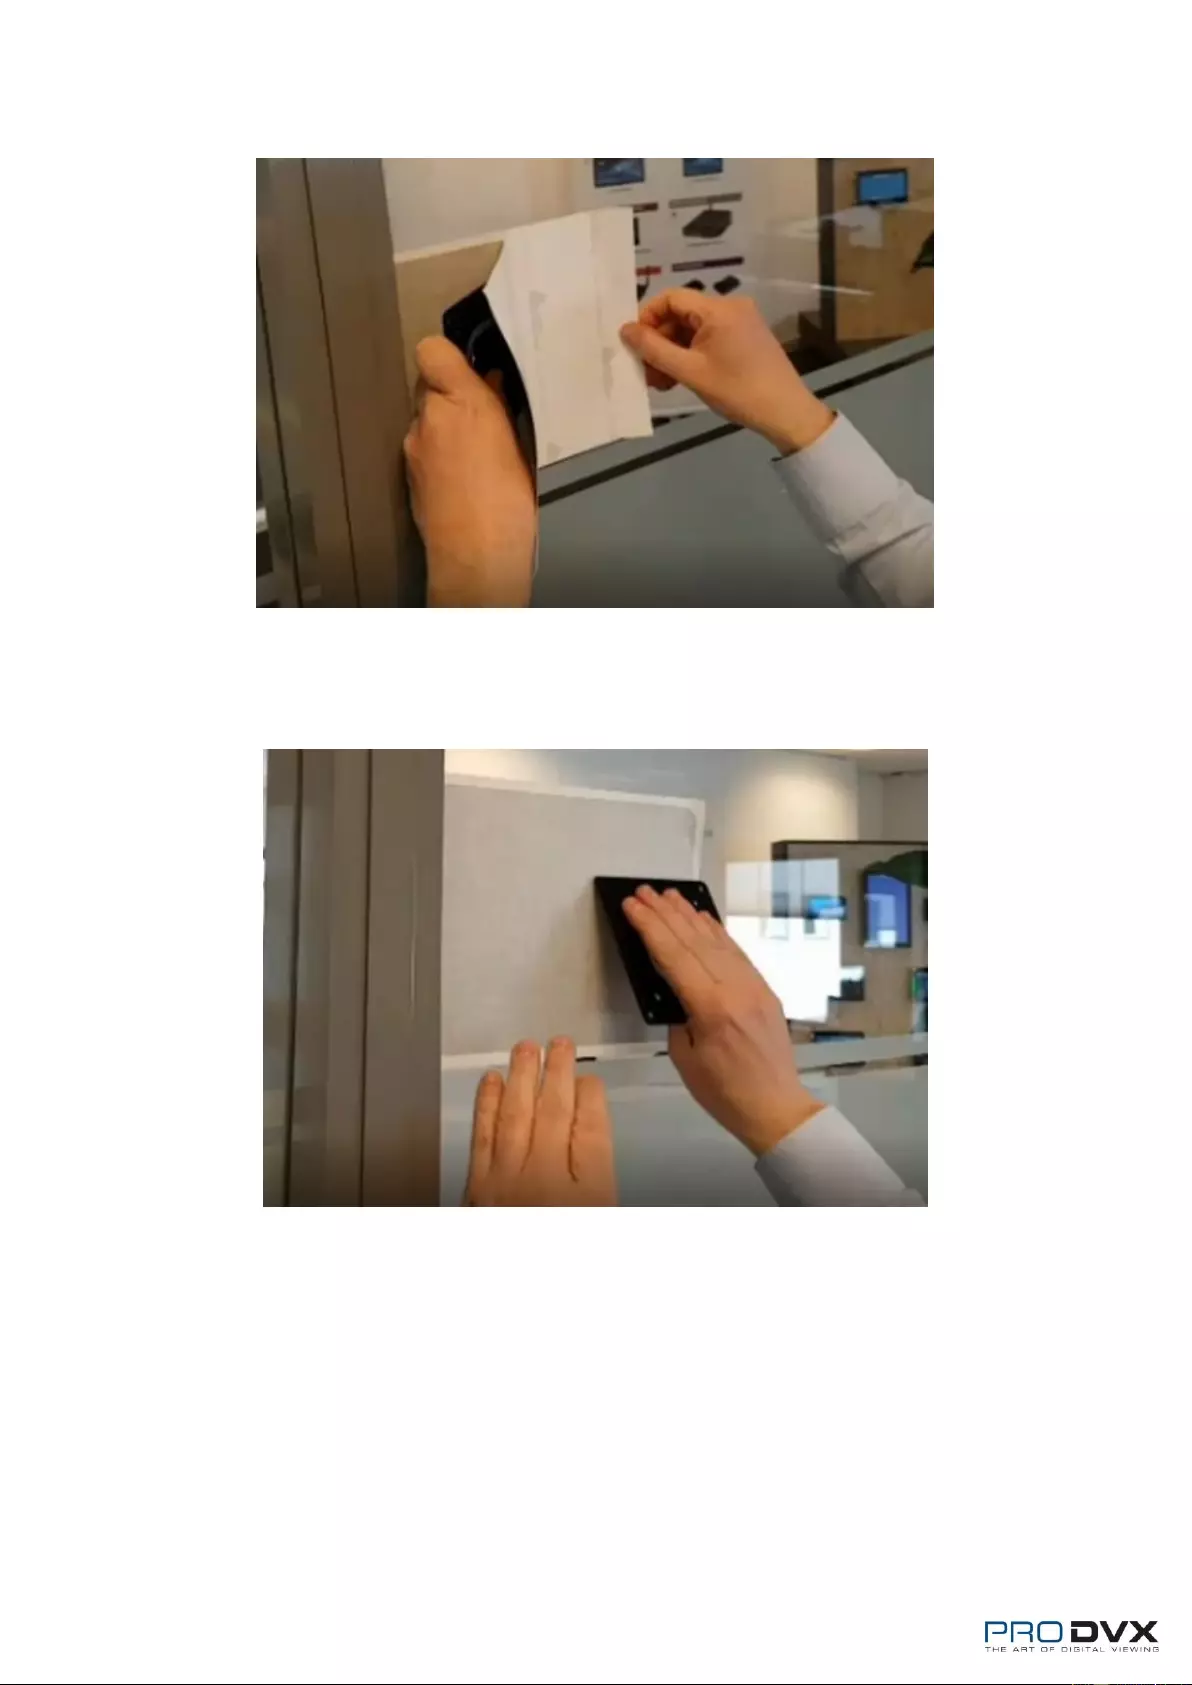
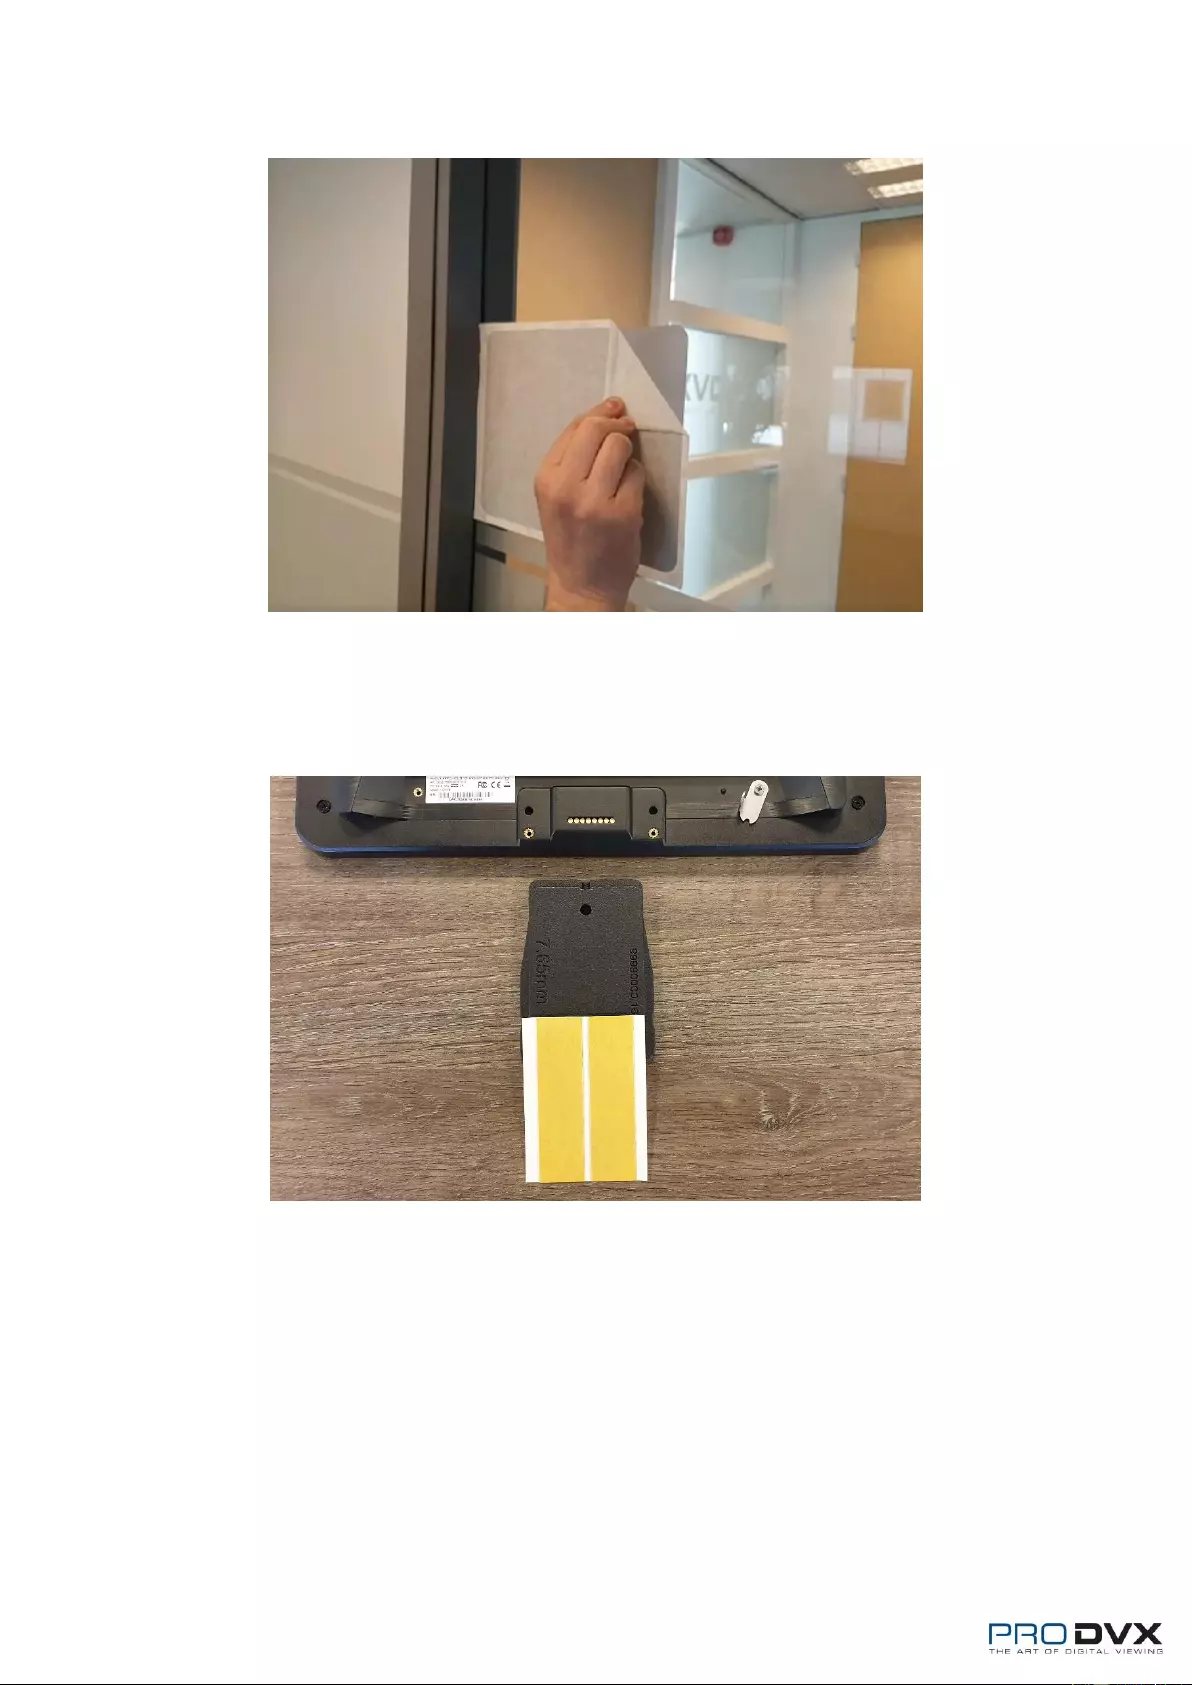
6) Add the adhesive strips on the backside of the center block where 7.65mm mentioned
is.
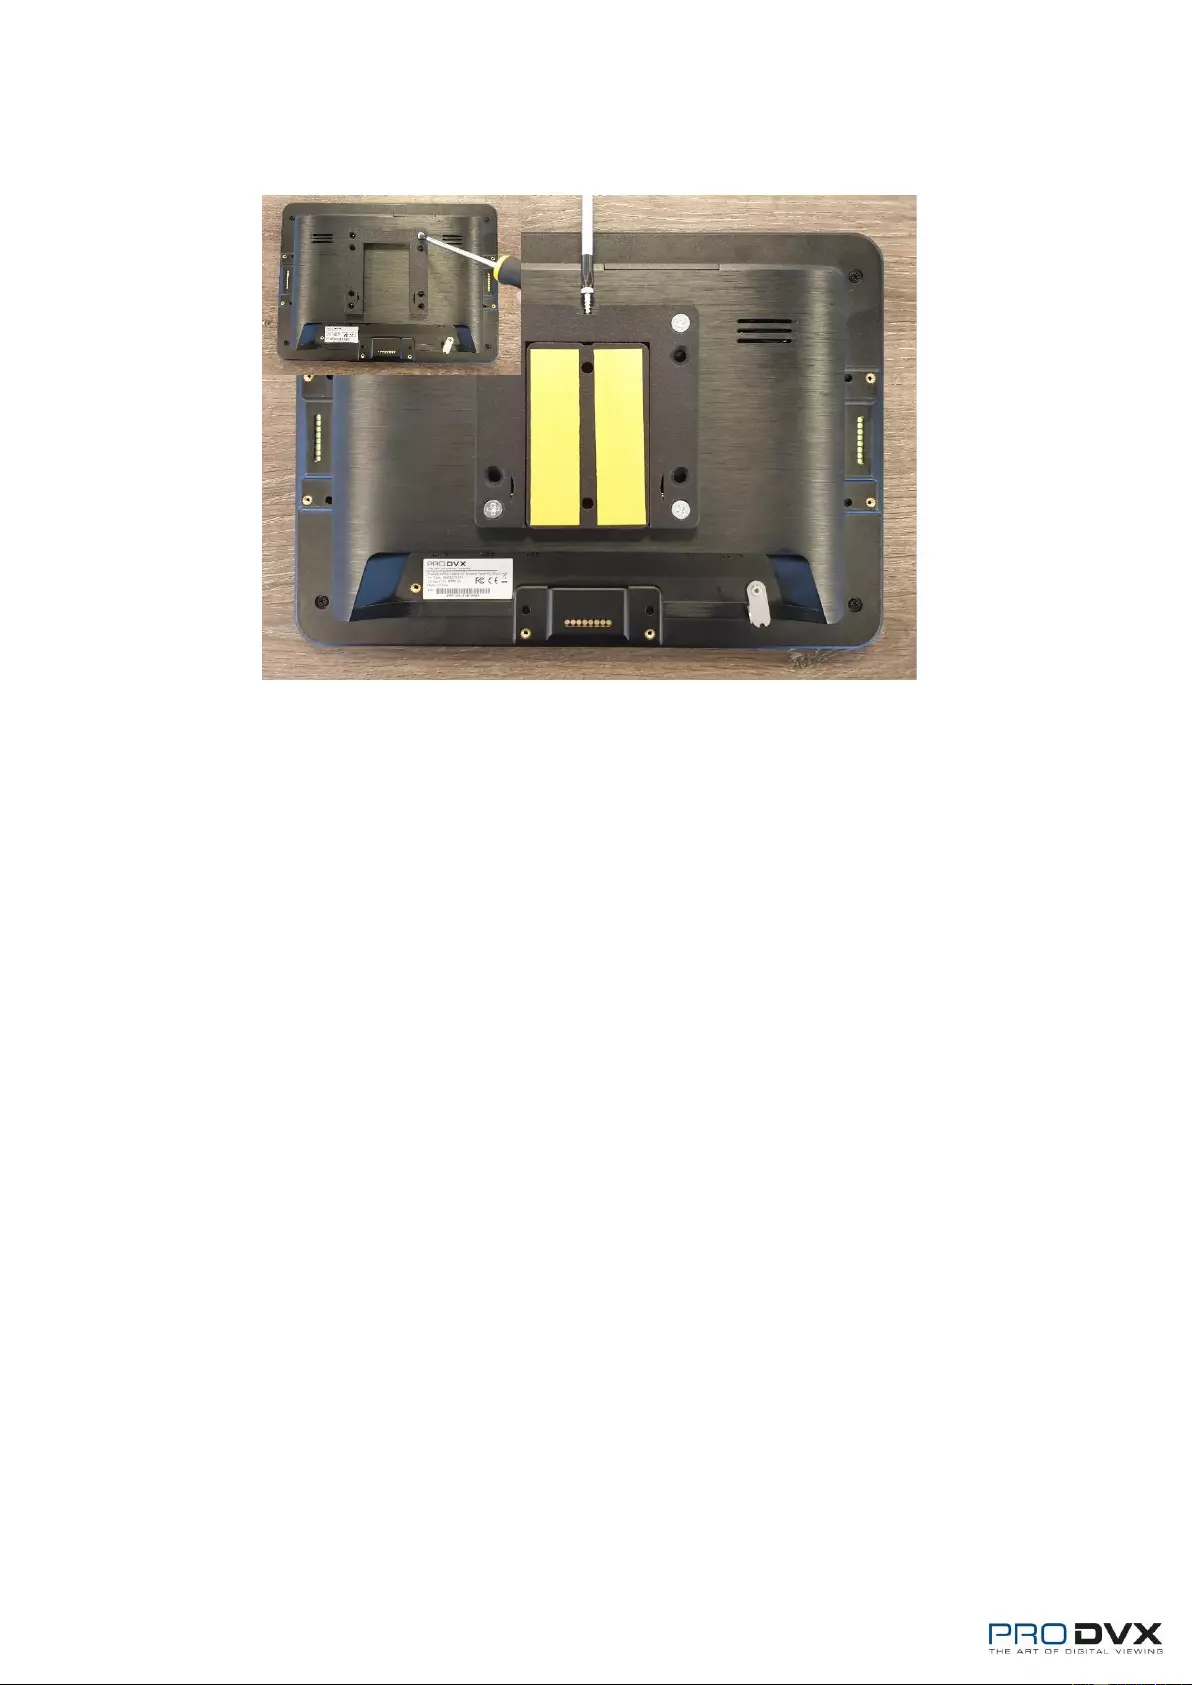
7) Slide the center block with the 2 adhesive strips into the U-frame.
Screw the U-frame with the center block in it, on the back of the ProDVX display using
the 4 VESA screws
8) To secure the display, prepare the security screw by placing the long security screw in
the hole on top (red circle)
9) Clean the silver foil/sticker with Pro-Screen Cleaner spray
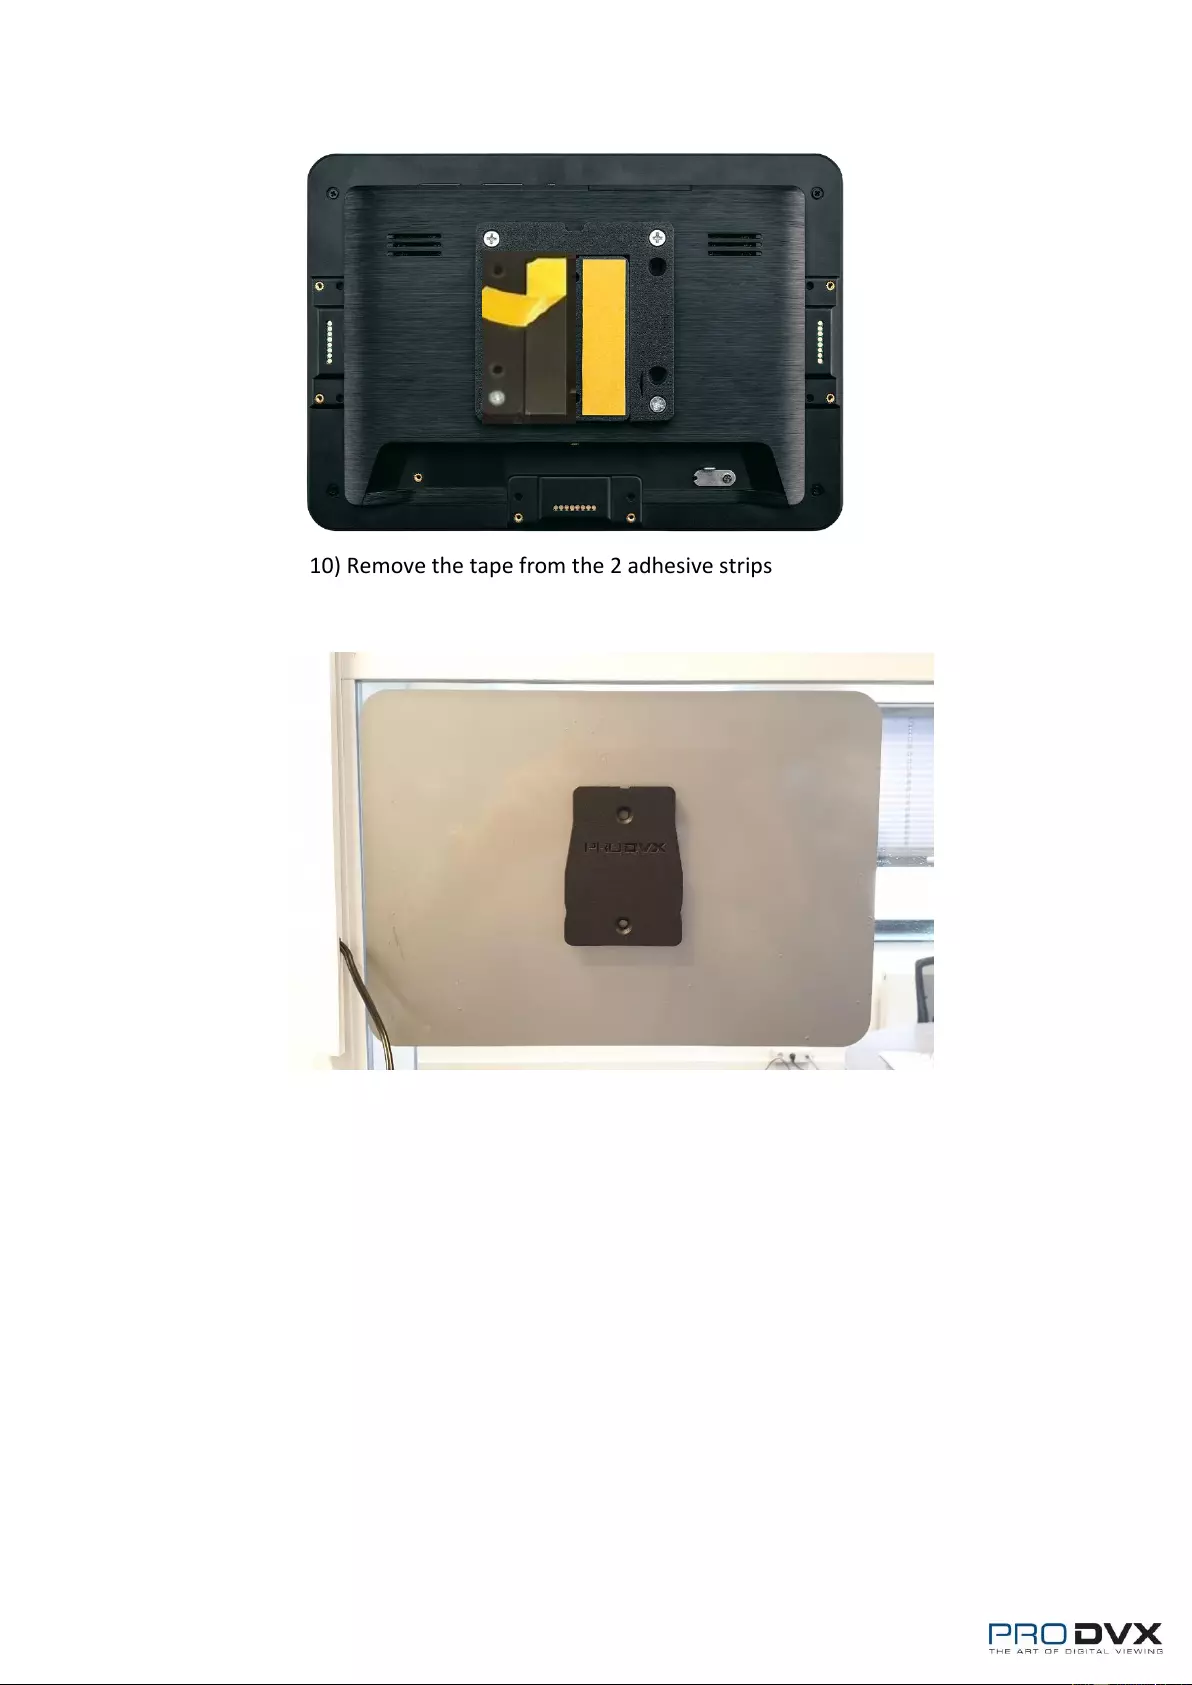
10) Remove the tape from the 2 adhesive strips
11) Firmly press the adhesive centre block in the middle of the foil
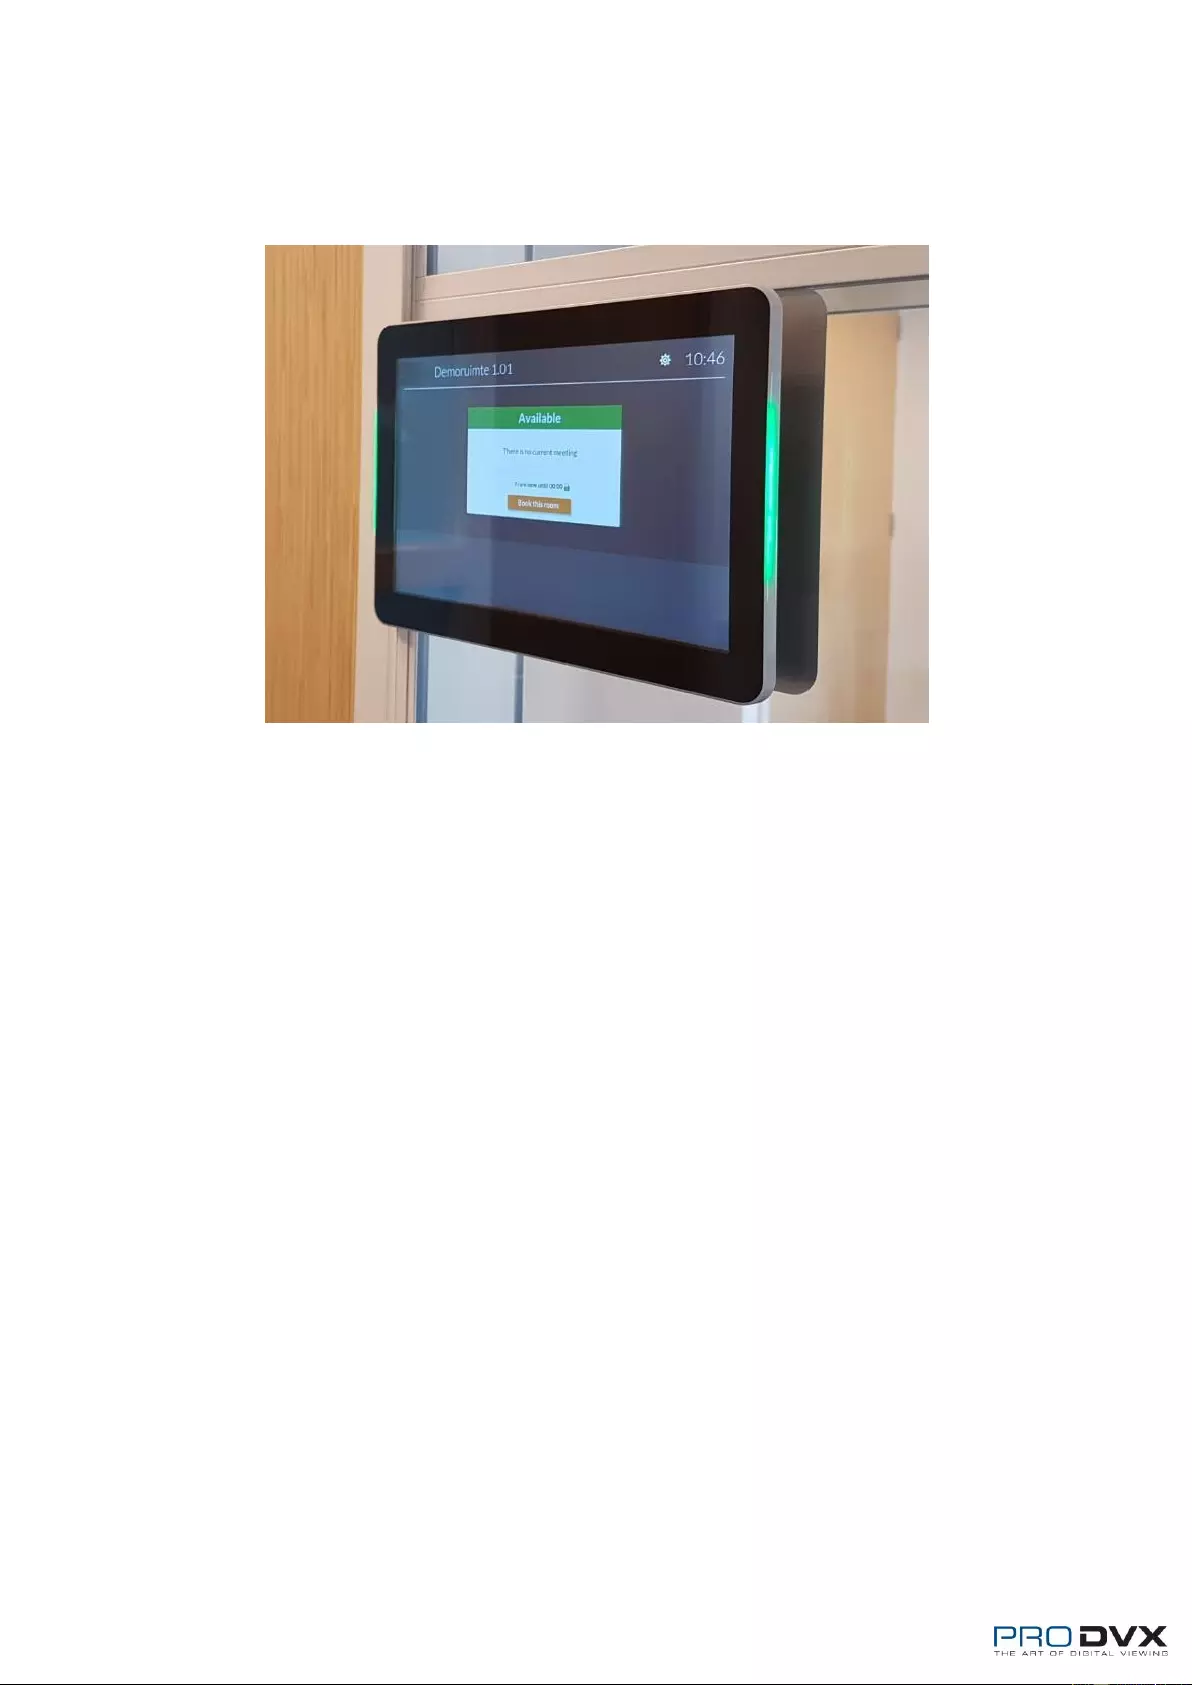
12) Slide the ProDVX display top-down on the center block
13) Use a Phillips screwdriver to tighten the long security screw on top
14) The ProDVX GM-75 Glass Mount is now successfully installed