TerraMaster D5-300 User Manual
Displayed below is the user manual for D5-300 by TerraMaster which is a product in the Disk Arrays category. This manual has pages.
Related Manuals

User Manual
Copyright © 2016 TerraMaster All Rights Reserved.
Model:D5-300
TerraMaster TDAS
Contents
1. Overview
2. Packing Contents
8. Data Recovery
4. Indicators
3. Apperance
5. Hardware Installaon
6. Connecon
7. DISK GROUP
1
2
2
3
3
4
5
6
8
User Manual
User Manual
2
1. Overview
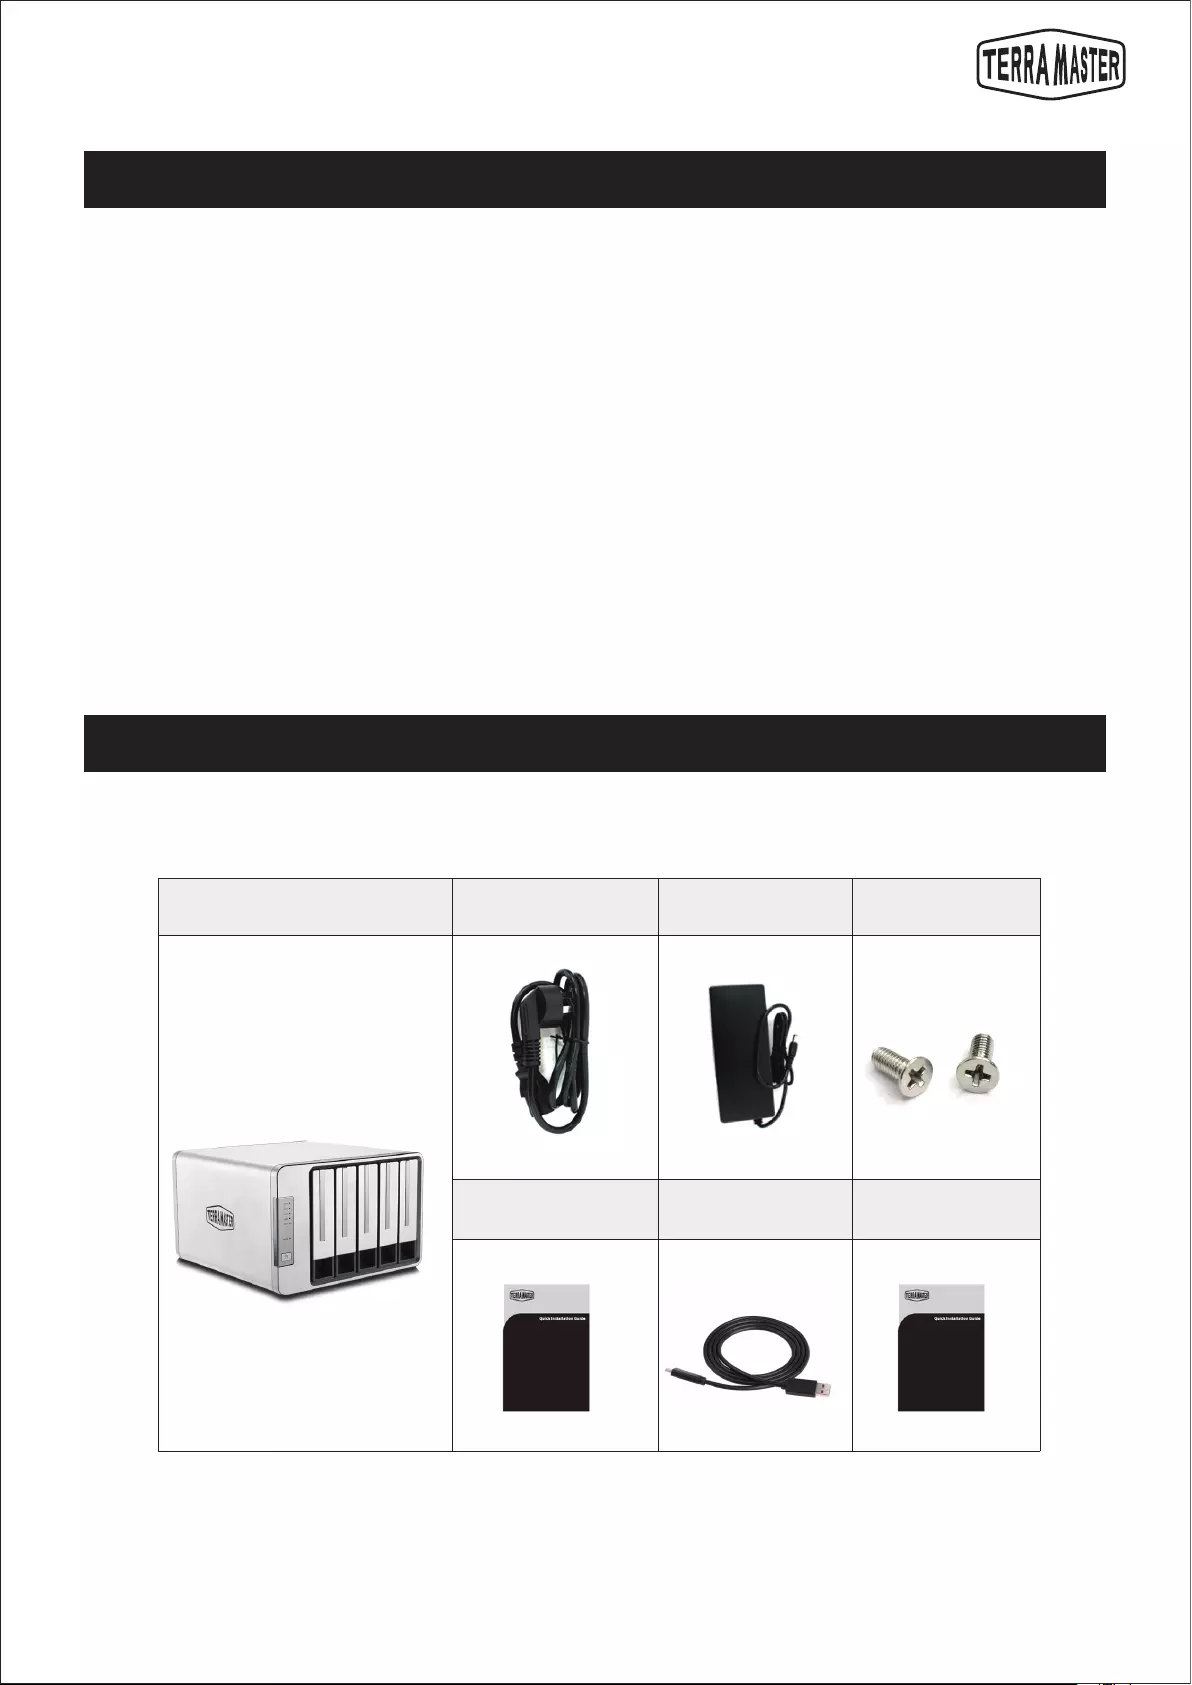
2. Packing Contents
TDAS is the collecve name of TerraMaster Direct Aached Storage. This product belongs to the TerraMaster
TDAS product series. Please read the instrucons carefully before use. If you have any queson, please visit
the “Support” on TerraMaster’s official website or contact TerraMaster’s technical support team.
Main unit *1 Power cord *1 Power adapter*1 Several screws
Installaon guide *1 USB type-C cable*1 Product brochure
(oponal)
When you receive your newly purchased product, please check whether the package contains the following
arcles. If any of them are missing, please contact our dealer in me.
When you receive your newly purchased TDAS product, please log in to TerraMaster’s official website
(www.terra-master.com) first, find the page of “Quick Guide”, and perform the installaon and make changes
to the sengs according to the Guide.
In order to meet the improvement requirements of this product, the external design, specificaons and other
aspects of this product may be changed from me to me without prior noce.
Please note that the pictures and illustraons in this manual are only intended as an illustraon may be
different from the real product.
3
User Manual
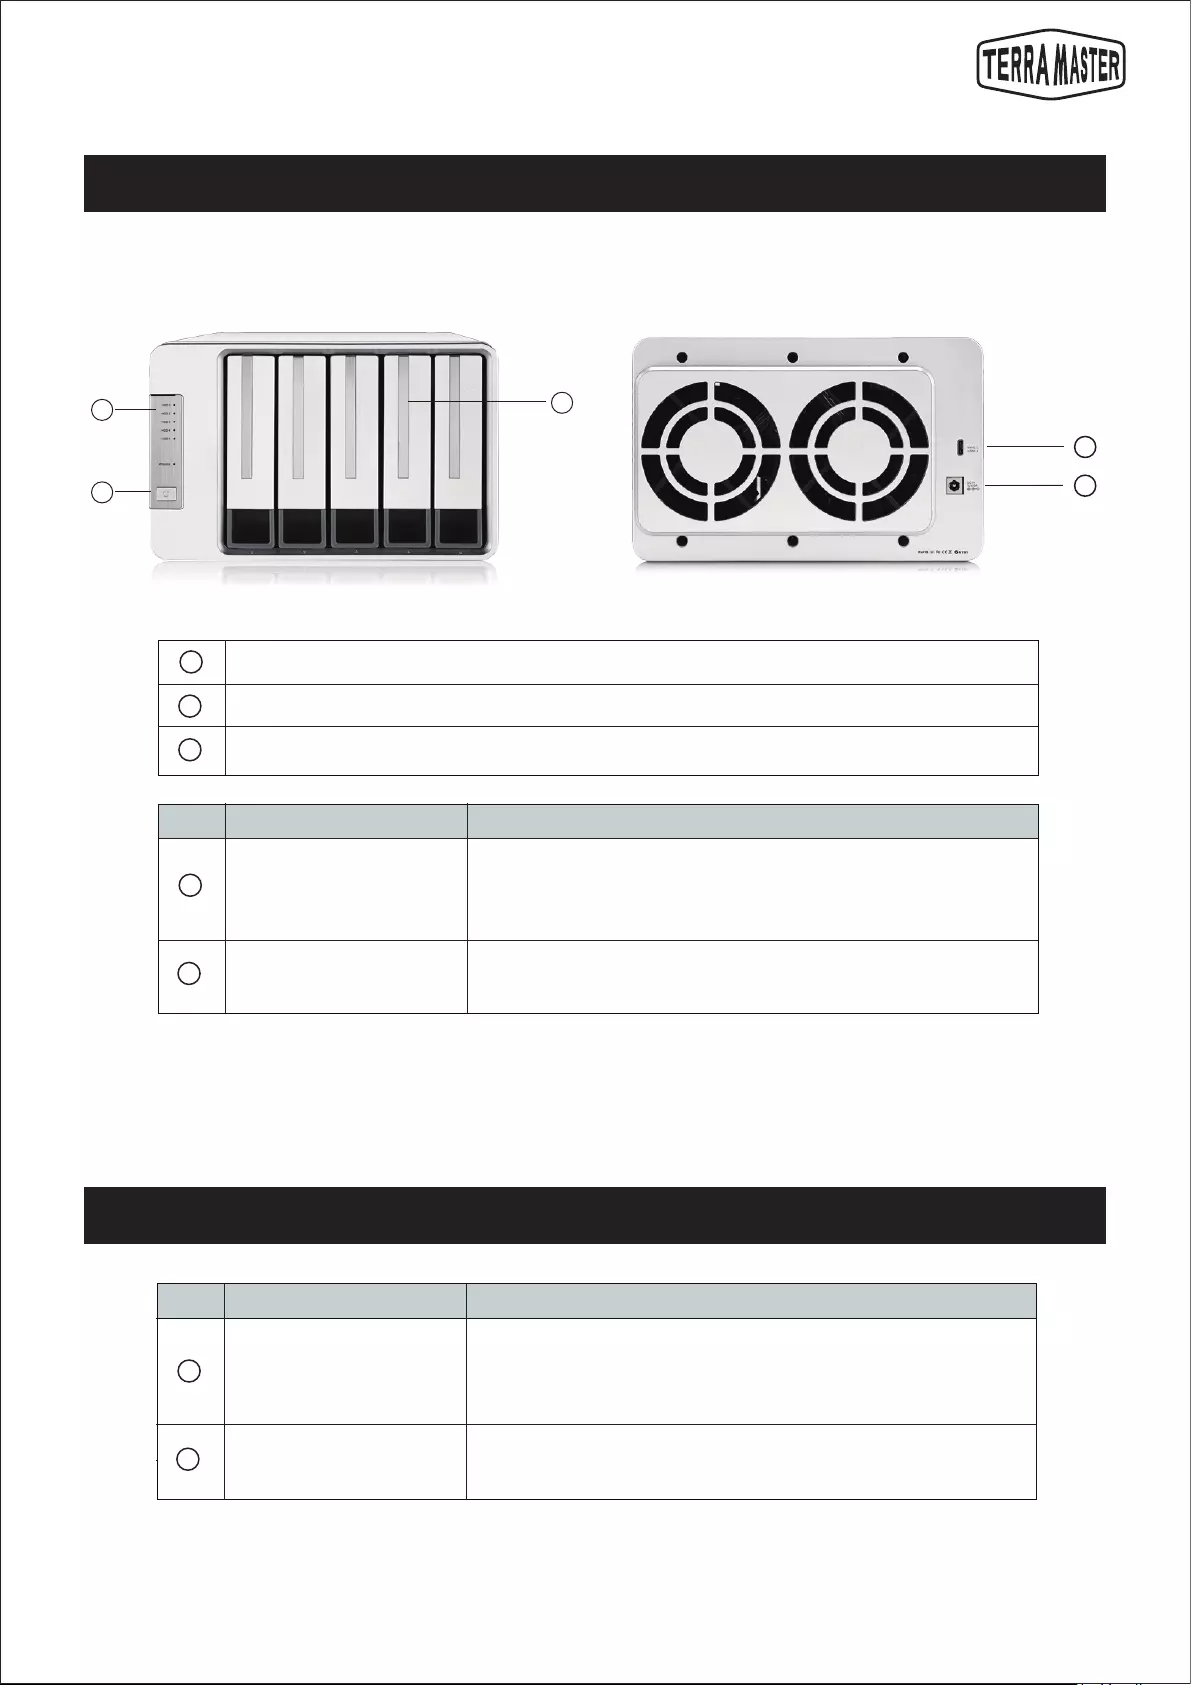
Illustraon of panel: Illustraon of rear cover:
3. Appearance
1
2
3
4
5
NO Descripon Interface
Hard disk tray, used for holding hard disks
Hard disk indicator
Power buon
Power Jack
USB Type-C interface
DC 12V power input
Warning: Do not use non-original power adapters. Otherwise the
device may be damaged!
USB data transmission interface
2
3
NO Descripon Indicator
Hard disk indicator
Power indicator
1.Red: The hard disk is faulty or is restoring data.
2.Blinking green: Reading or wring data.
3.Off: No hard disk detected.
1.Steady on: Powered on
2.Off: Powered off
4. Indicator
5
4
1
2
3

User Manual
4
The product needs to be equipped with 2.5 or 3.5-inch SATA hard disk. If the product you buy does not come
with installed hard disk, you will need to purchase hard disk. The product can be used only aer hard disk
installaon and product inializaon are complete.
5. Hard Disk Installaon
1. Pull the handle out of the hard
disk tray, Grasp it and draw the
hard disk tray from the product.
2. Fix in the hard disk and tray by
using the given screws and insert
the tray into the product along
the track. While inserng the tray,
please open the handle and keep
the handle in this posion.
Otherwise, the tray may not be
inserted into the product
correctly.
3. Aer the tray is fully inserted,
the handle should be closed. The
hard disk installaon is
completed. If you would like to
install the remaining hard disks
your have, please refer to steps
above.
Procedure for hard disk installaon:
User Manual
5
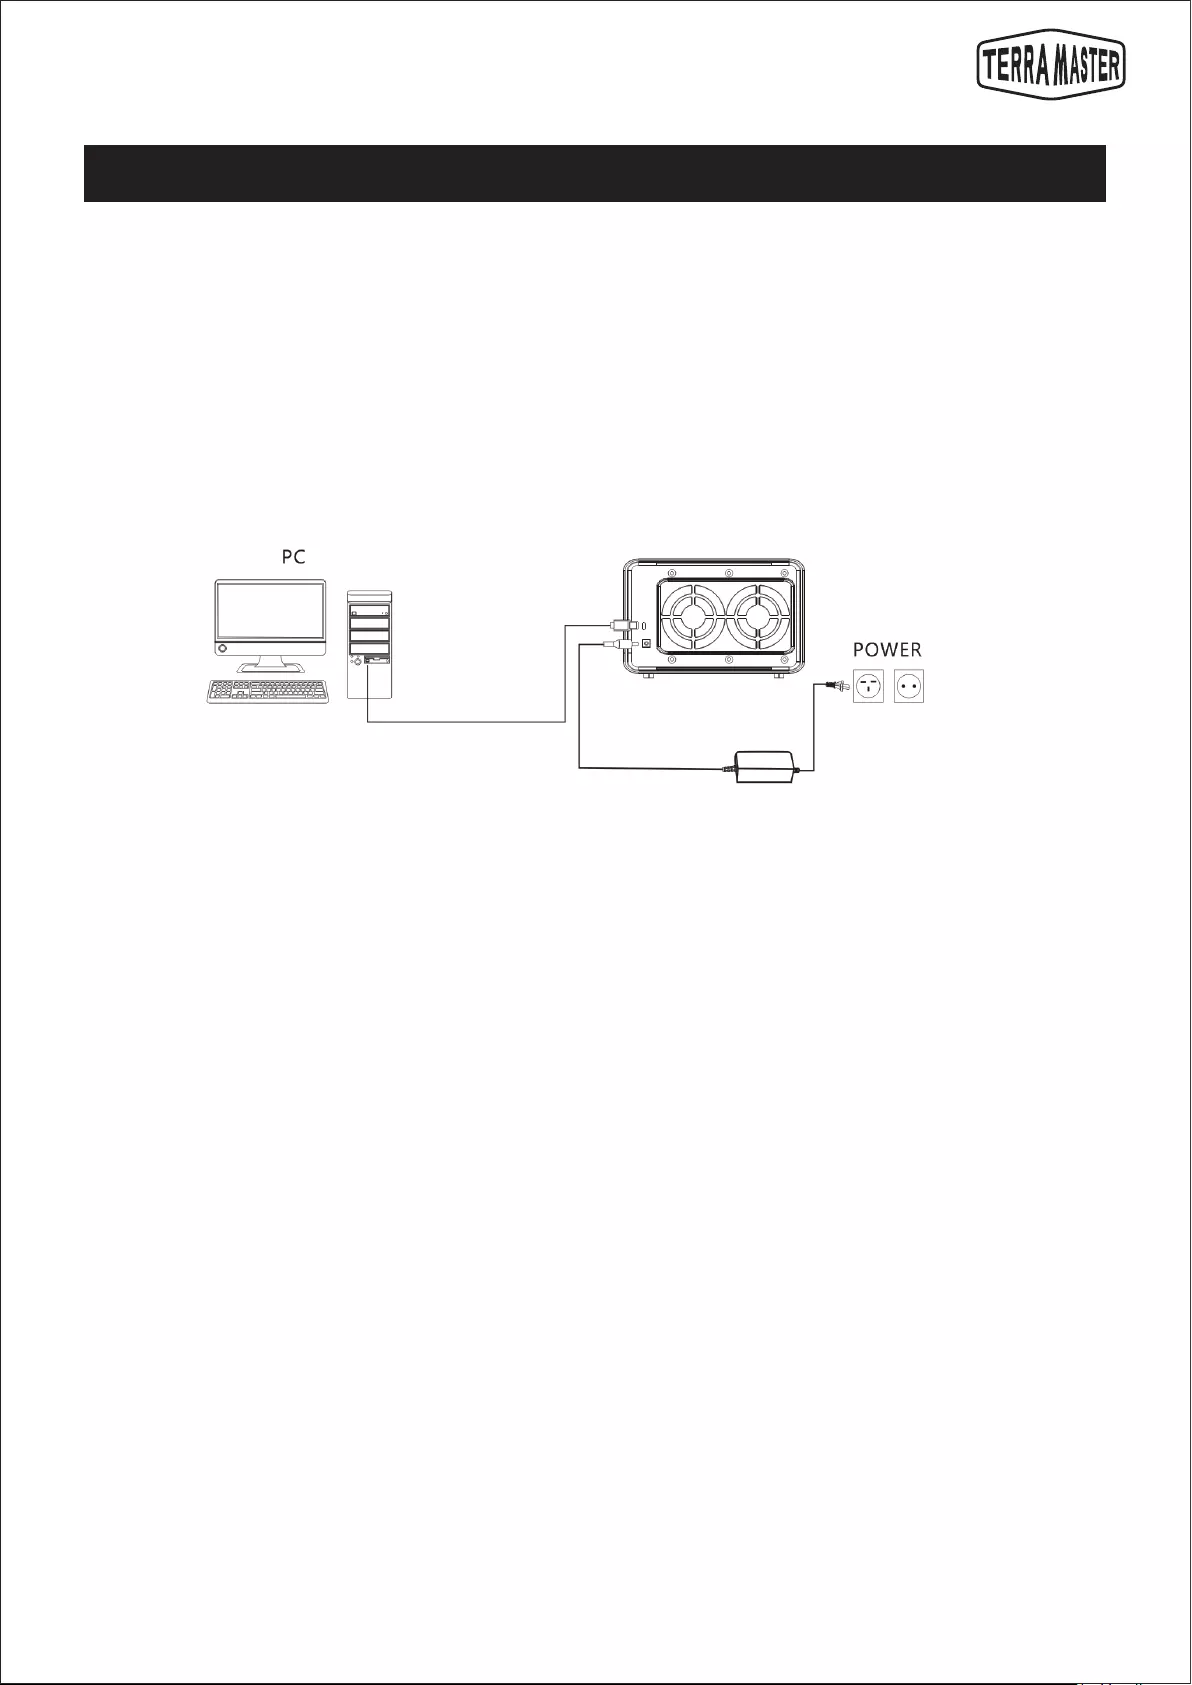
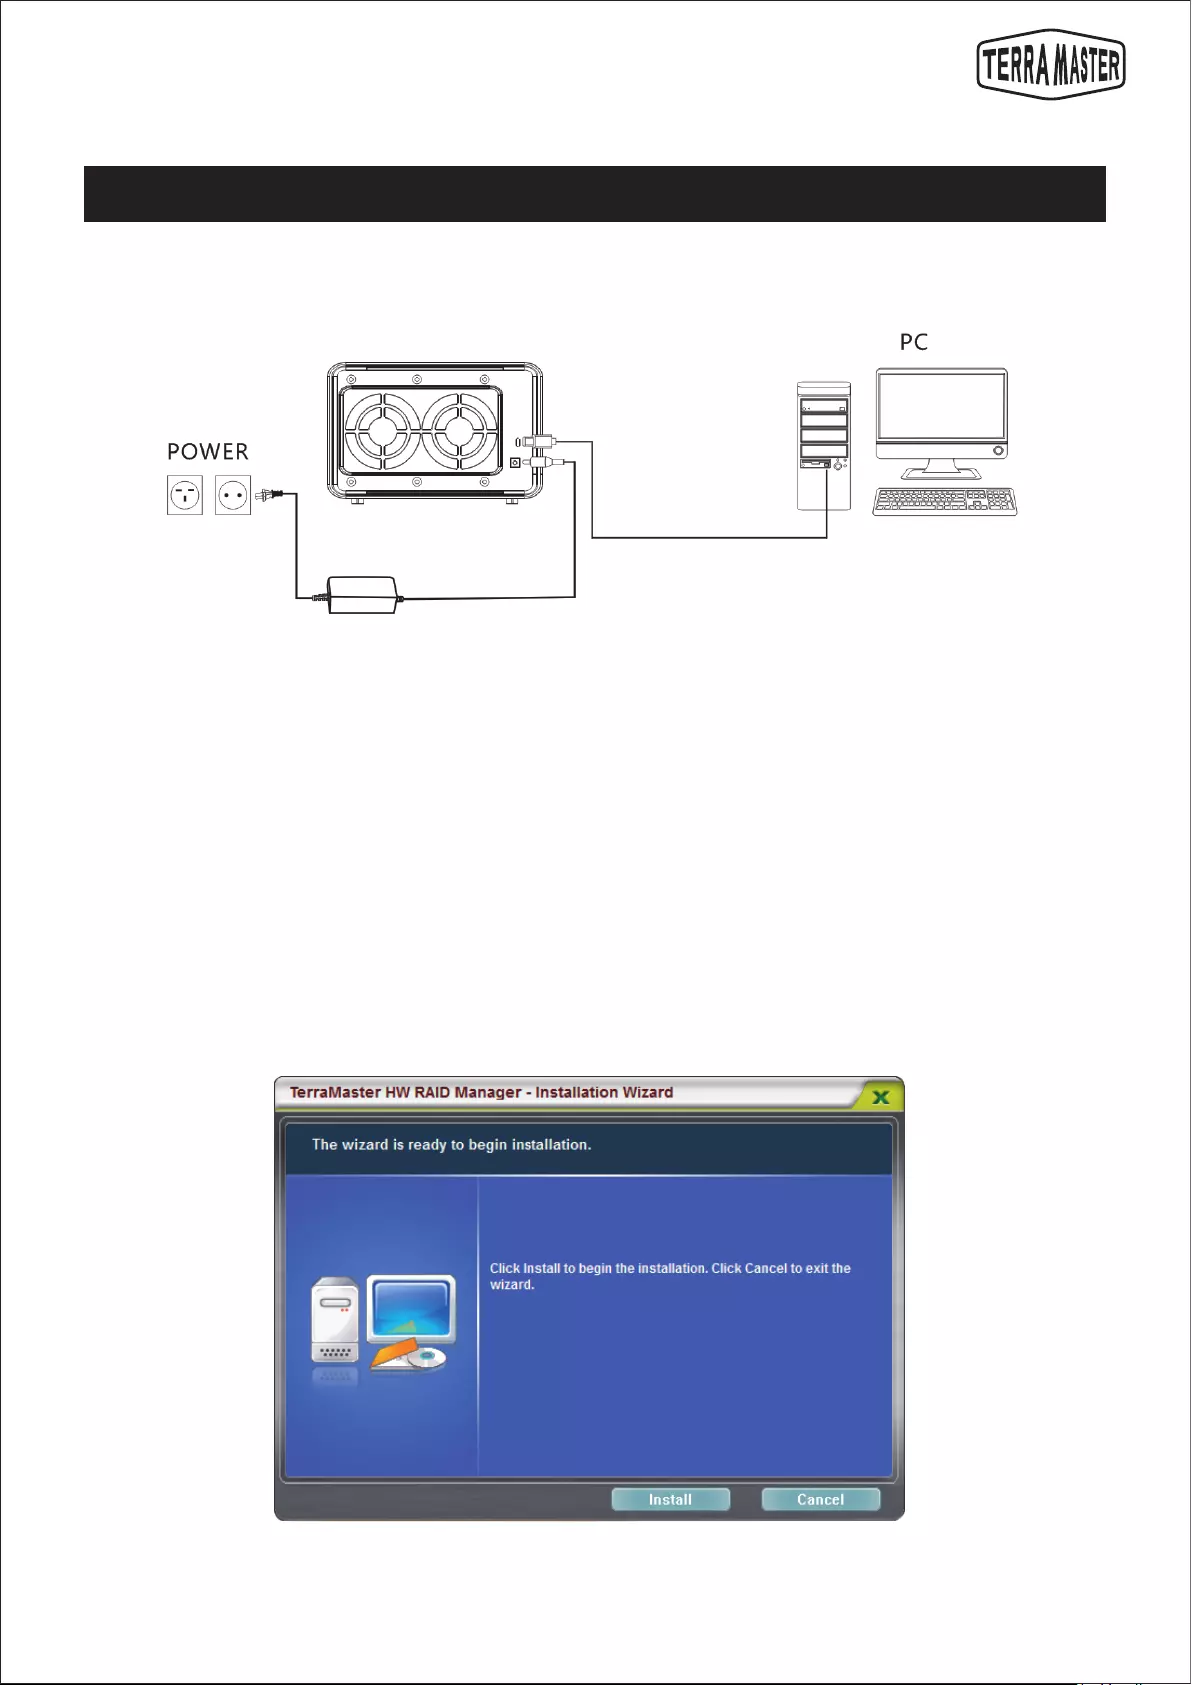
Procedure for connecon:
Step 1:
Connect one end of the USB Type-C cord to the Type-C interface of the product, and connect the other end to
the USB interface of computer.
Step 2:
Please connect the product a power source by using the power adapter. The power adapter provides 12V DC;
Warning: do not use the non-original power adapter for this product. Otherwise, the product may malfuncon
and the physical body may be damaged in an extreme case!
Step 3:
Press the power buon to power on. When the power is connected, the product’s power indicator will turn
on.
Step 4:
If the hard disks work normally and the product powers on, the hard disk indicator will temporarily display
red, followed by Blinking green, and finally green lights. If the hard disk indicator displays red all the me, it
indicates that the hard disk is cannot be read. The hard disk may be damaged, inccompable with the product.
If this occurs, please turn off the product and proceed to reinstall the same hard disk. If the hard disk indicator
sll displays red, please replace the hard disk with a new one and try again.
Step 5:
Aer the product is connected to your computer, you might see a prompt asking you to format the product
or come across a message reading “The disk you inserted was not readable by this computer”. Please select
“Cancel” or “Ignore”, as the formang of the product should occur only aer you create a disk group.
6. Connecon
Before use, power on the product and connect the data interface to your computer.
D5-300
6
How to download RAID Manager?
The method and procedure for creang and changing a disk group are as follows:
7. Disk Group
User Manual
To create a disk group for the product, you need to use a piece of auxiliary soware called RAID Manager, for
which there are two versions: Windows and Mac OS. TerraMaster provides free downloads of this soware to
users.
Please go to the official website of TerraMaster (www.terra-master.com), find the model of this product in the
model column at “Download”, and then download the RAID Manager in the download directory.
Step 1:
Install and run RAID Manager on your computer.
This secon introduces how to create and change a disk group.
D5-300
7
User Manual
Step 2:
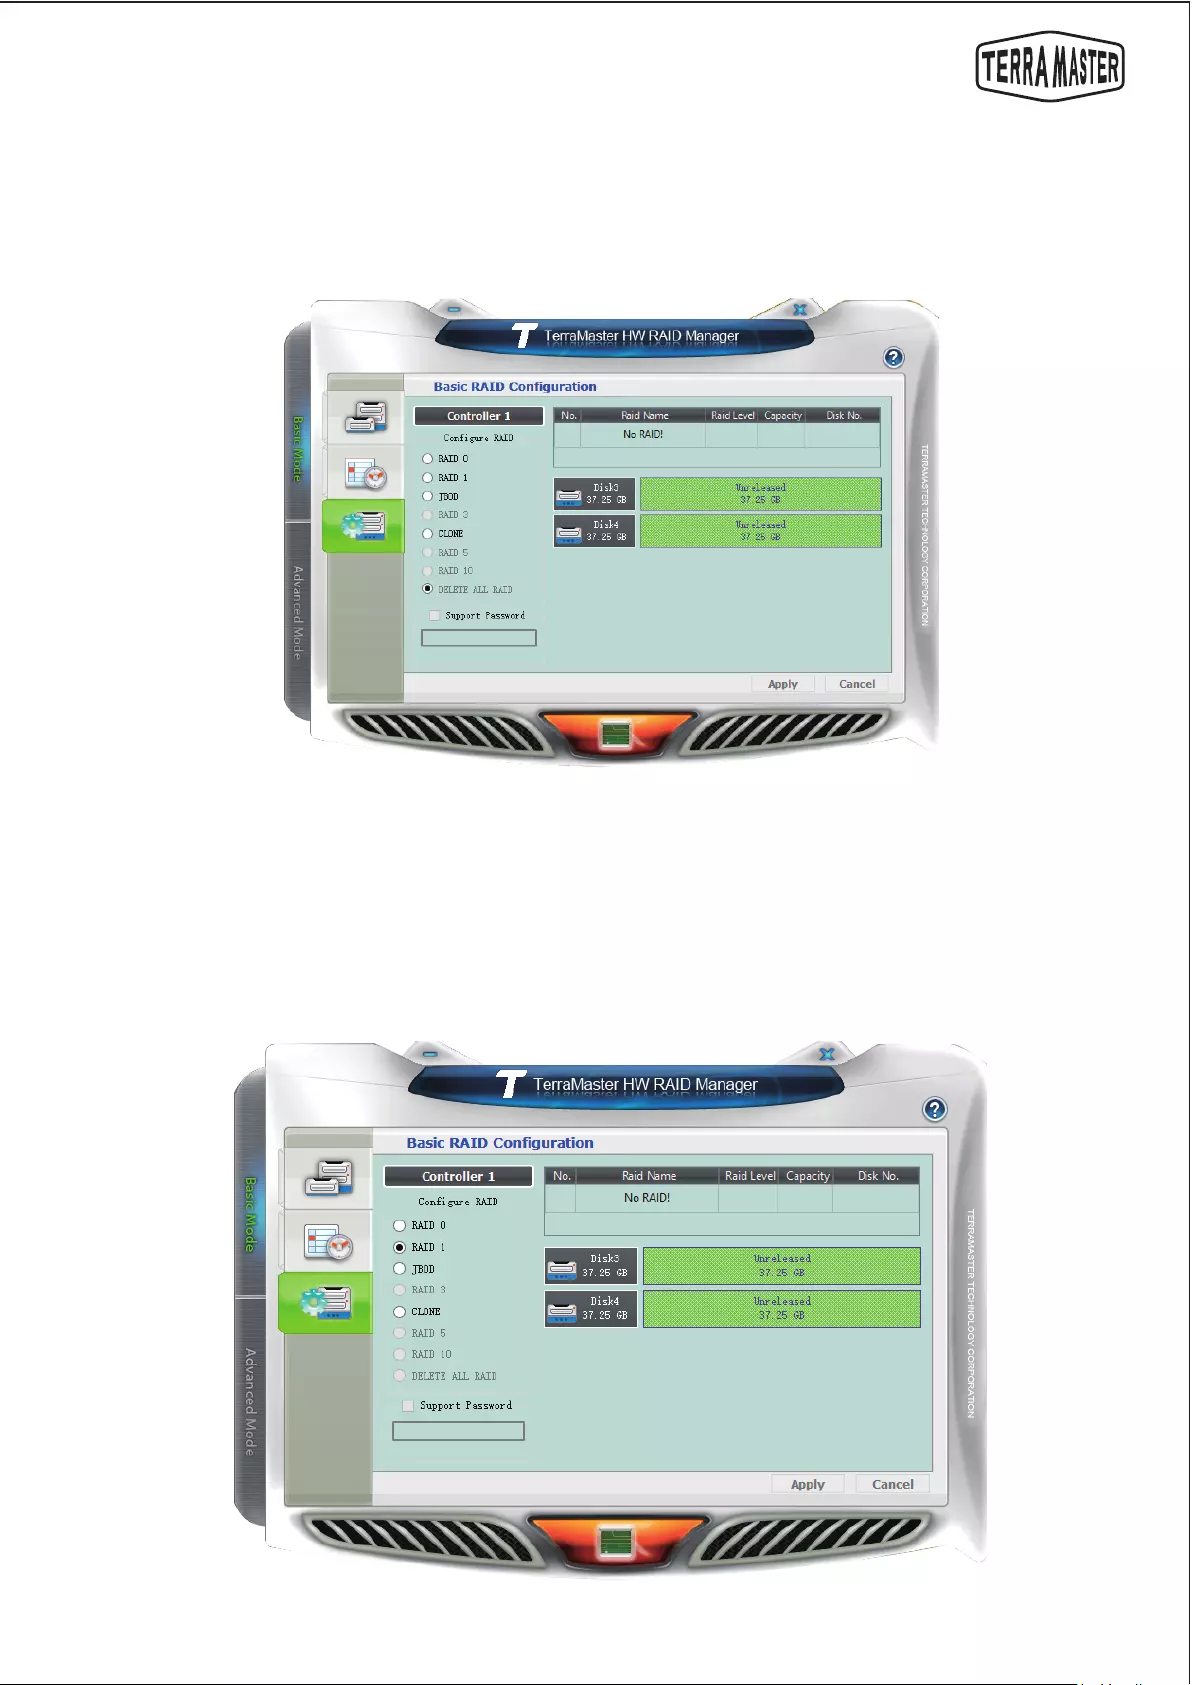
Delete disk group (if you haven’t created a disk group on this product, ignore this step).
In the menu of the RAID Manager, choose “Basic Mode” > “Basic RAID Configuraon”, select “Delete All RAID”
in the “Configure RAID” menu, and click “Apply” to complete the deleon. During this process, if your
computer prompts you to format the product or display a message reading “The disk you inserted was not
readable by this computer,” please select “Cancel” or “Ignore”.
Step 3:
In the menu of “RAID Manager”, choose “Basic Mode” > “Basic RAID Configuraon”, select the type of disk
group you want to create in the “Configure RAID” menu, and click “Apply” to complete the creaon. During
this process, if your computer prompts you to format the product or display a message reading “The disk you
inserted was not readable by this computer,” please select “Cancel” or “Ignore”.
8
Warning!
User Manual
END
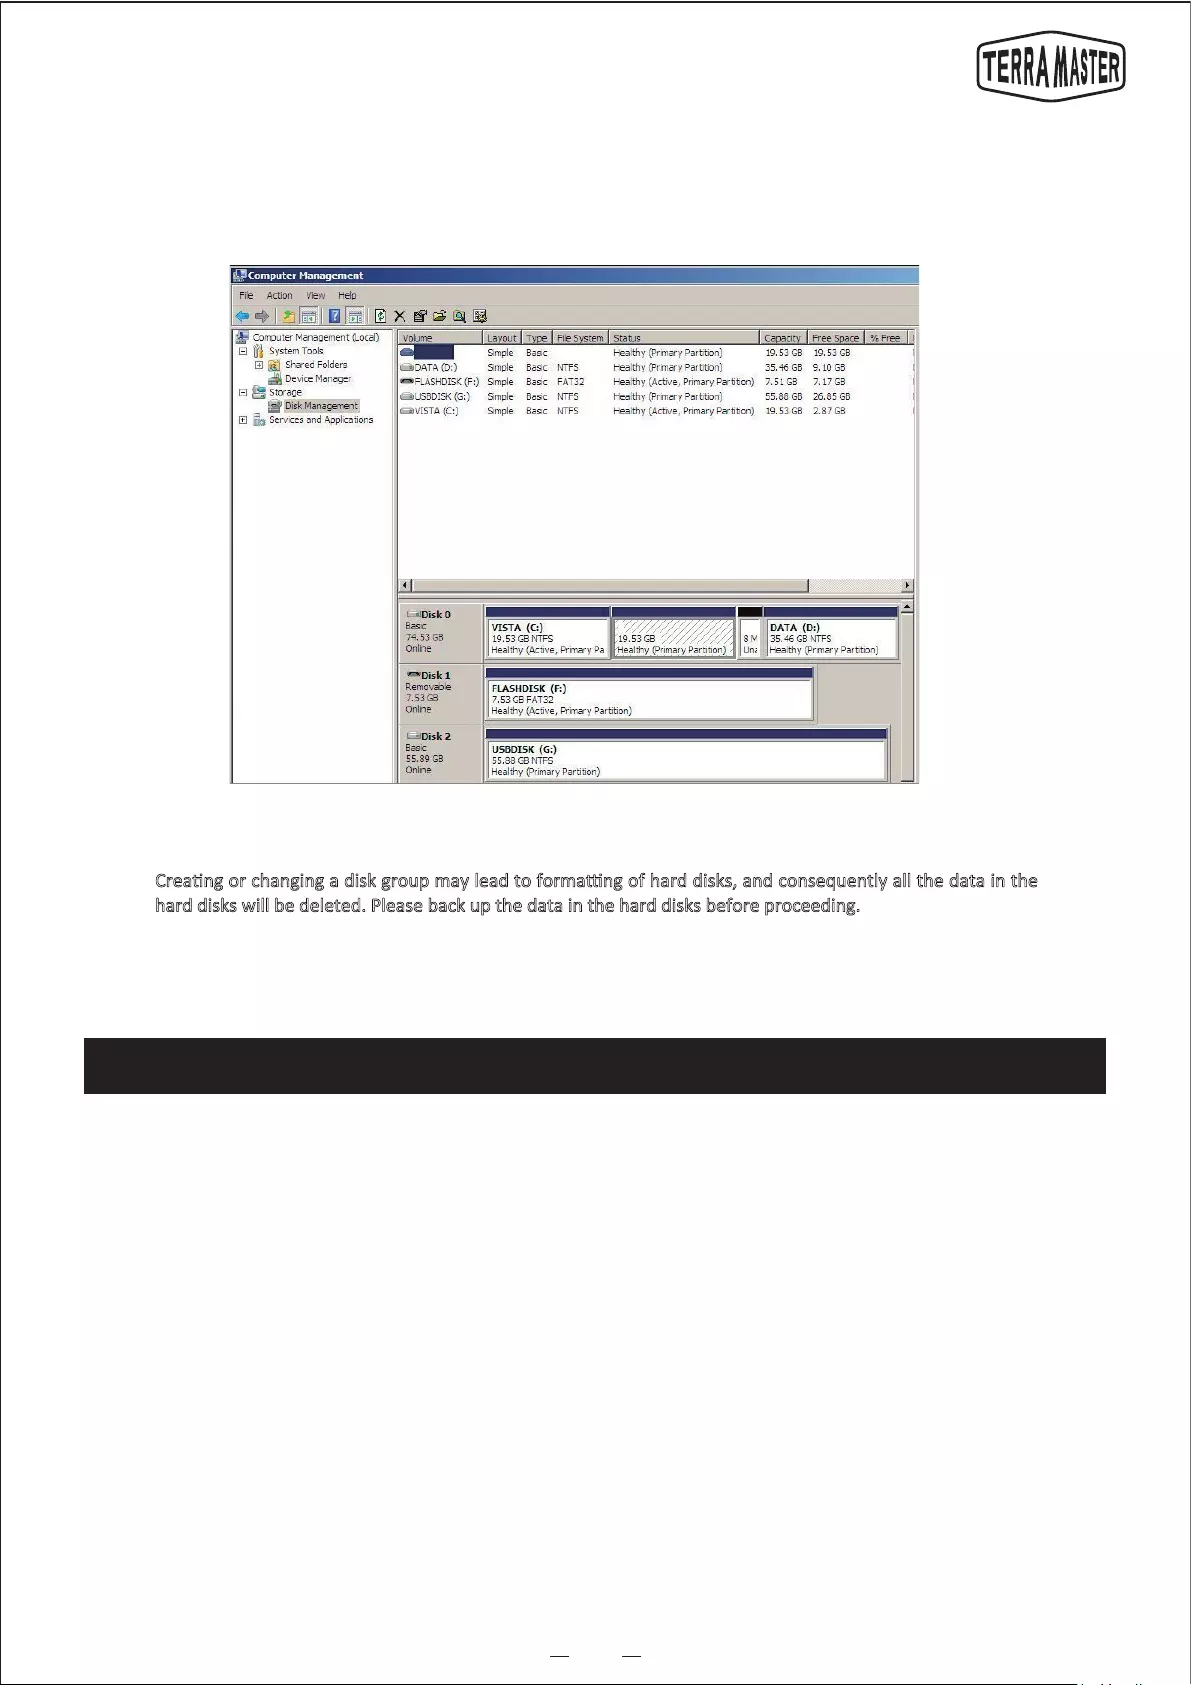
Step 4:
Format disk group. Switch to the “Disk Management” menu on your Windows computer or the “Disk Ulies”
menu on your Mac computer to format the disk group. Aer the formang is completed, the product is ready
for use.
8. Data Recovery
This product supports automac data recovery. If a hard disk in a disk group is faulty (in that case, the hard
disk indicator will turn red), you can directly replace the faulty hard disk, and data will be automacally
recovered to the new hard disk. This funcon applies only to disk group types of RAID5.
Creang or changing a disk group may lead to formang of hard disks, and consequently all the data in the
hard disks will be deleted. Please back up the data in the hard disks before proceeding.
Note: While you are replacing the faulty hard disk, the product needs to remain powered on and connected
to the computer. The capacity of the new hard disk should be larger than or equal to that of the faulty hard
disk. The amount of me that data recovery takes depends on the capacity of the hard disk. It ranges from a
few hours to tens of hours. The product and the computer need to remain powered on during data recovery.