Table of Contents
APC ER7SHELF User Manual
Displayed below is the user manual for ER7SHELF by APC which is a product in the Rack Accessories category. This manual has pages.
Related Manuals
Installation 990–91450 Release date: 02/2021
Easy Rack 50 Kg Shelf Kit ER7SHELF
Kit Instructions
The 1U, 50 kg Accessory Shelf can be installed to the vertical mounting flanges in
an empty space in the Easy Rack to support your equipment.
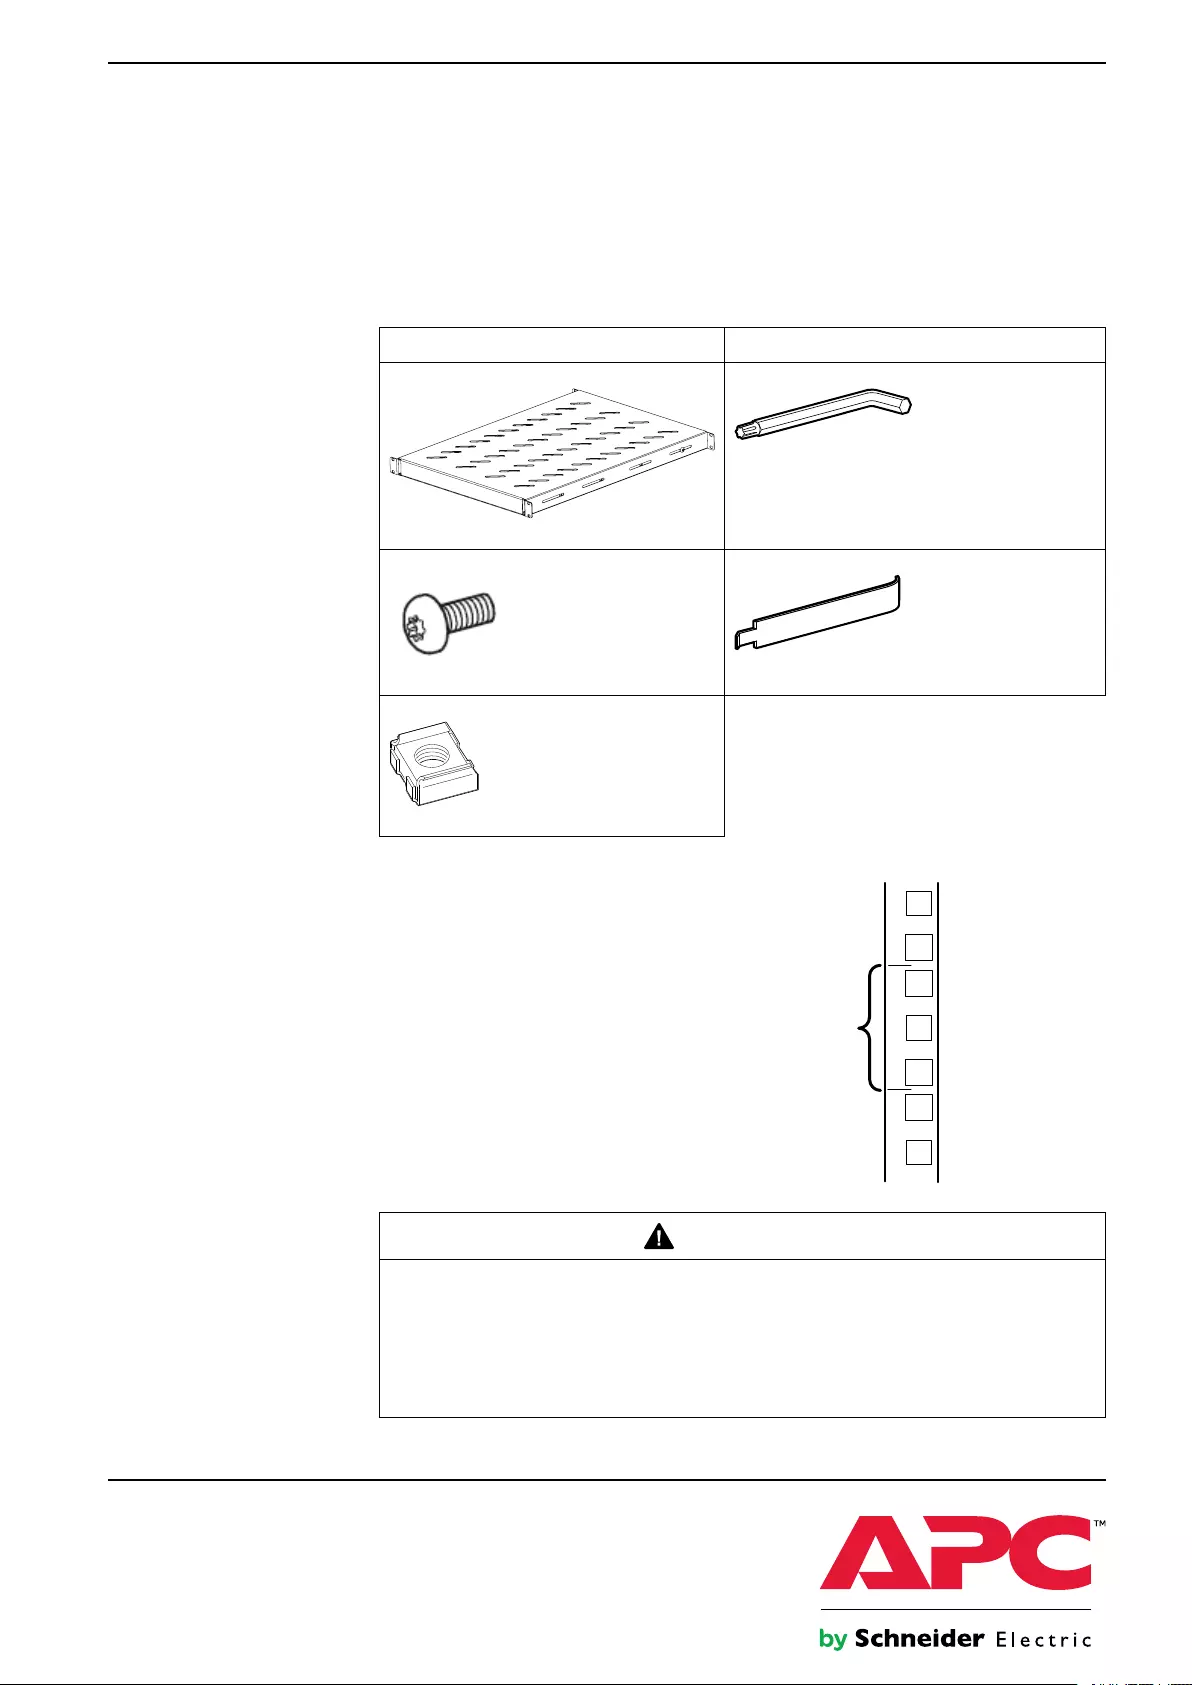
ER7SHELF Inventory Tools Required (not provided)
50 Kg Shelf (1)
Torx® wrench
M6 x 12 Pan Head T30 Screw (8) Cage nut tool
Caged Nut M6 14/16 SWG (8)
Proper location in the rack for the cage nuts:
1U
7
6
5
ns0014a
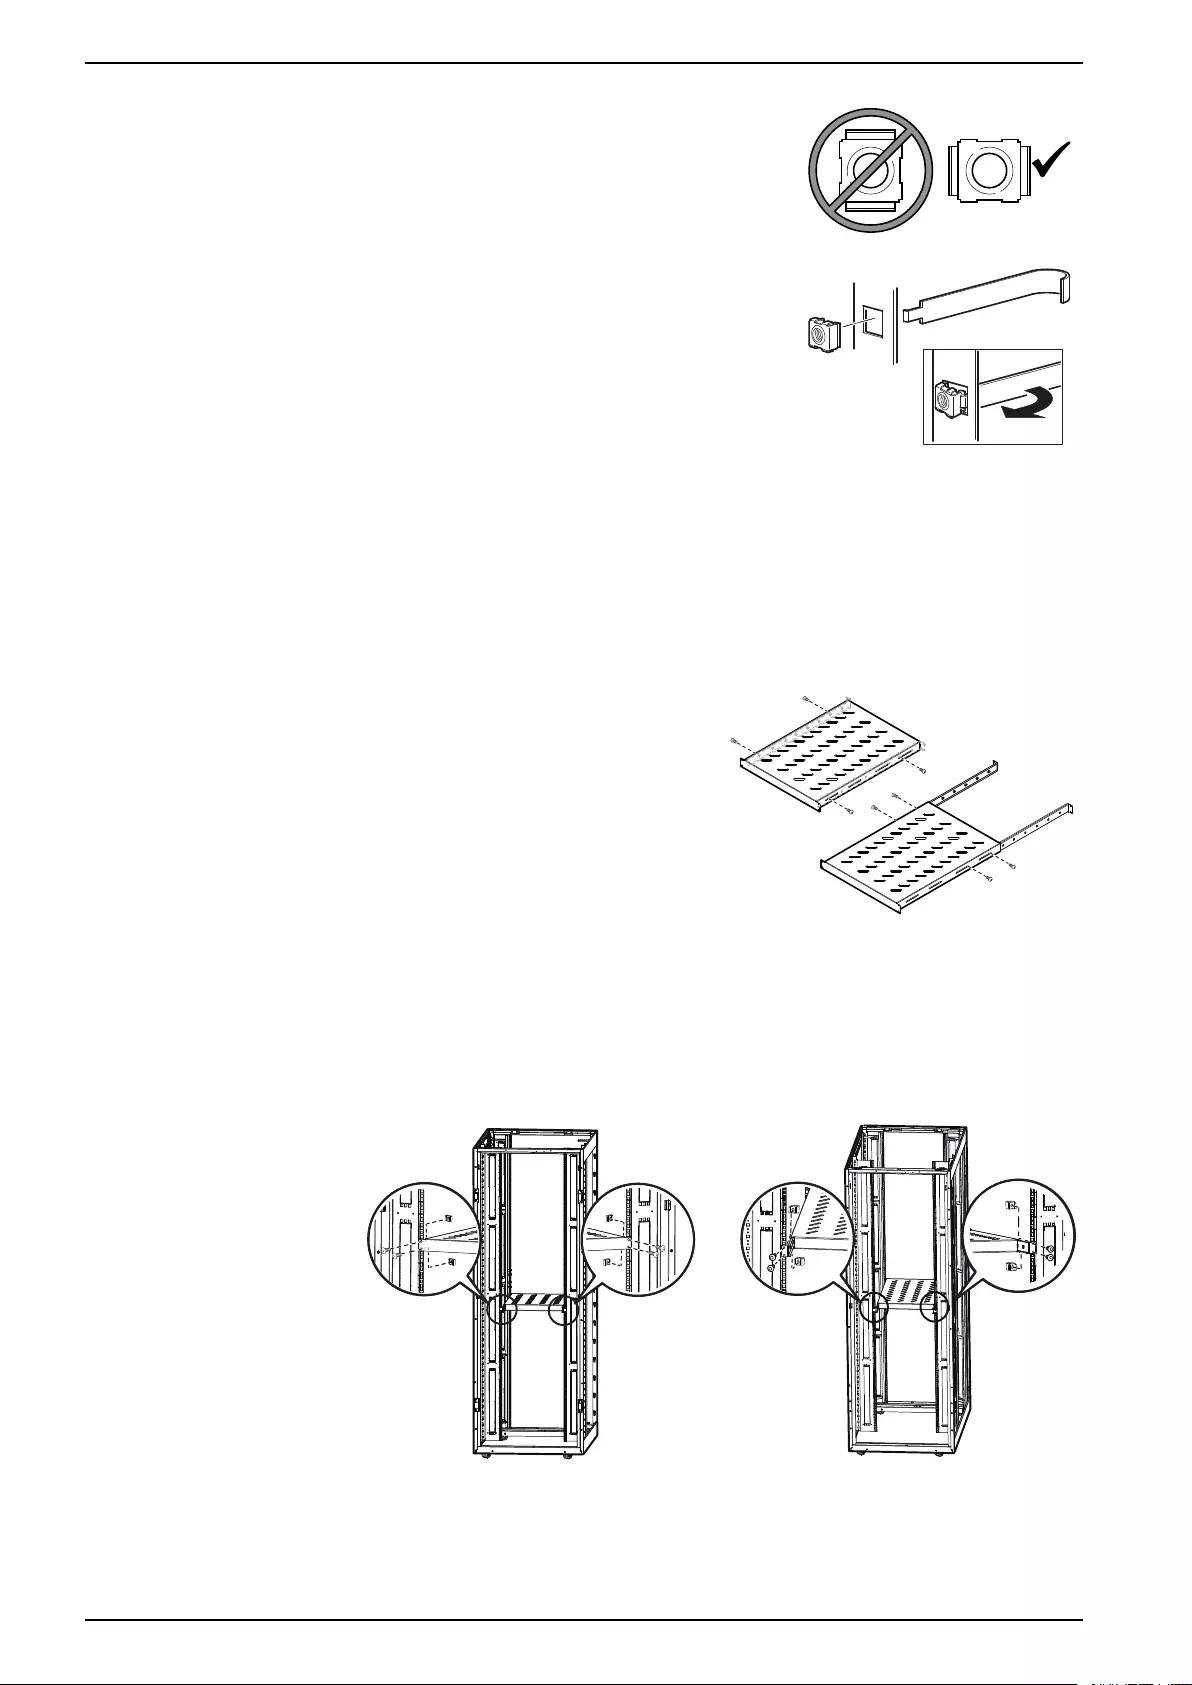
1. Locate the top and bottom U space on the vertical
mounting rails. Every third hole on the mounting rails
is numbered to indicate the middle of a U space.
2. Install the cage nuts on the interior of the vertical
mounting rail; then install the shelf.
CAUTION
FALLING EQUIPMENT HAZARD
Do NOT install cage nuts vertically with the tabs engaging the top and bottom of
the square hole.
Failure to follow these instructions can result in injury or equipment
damage.
APC by Schneider Electric
70 Mechanic Street
02035 Foxboro, MA
USA
www.apc.com
As standards, specifications, and design
change from time to time, please ask for
confirmation of the information given in this
publication.
© – 2021 APC by Schneider Electric. All rights
reserved.
Easy Rack 50 Kg Shelf Kit ER7SHELF
Proper installation position for the cage nuts:
ns1768a
• Install cage nuts horizontally, with the tabs engaging
the sides of the square hole.
• Install the cage nuts on the interior of the vertical
mounting rail.
Install the cage nut:
gen0188a
1. From the inside of the rack, insert the cage nut into the
square hole.
2. Hook one tab of the cage nut assembly through the far
side of the hole.
3. Place the cage nut tool on the other side of the cage
nut and pull to snap into position.
Remove the cage nut:
1. Remove any attached screw.
2. Grasp the cage nut, squeeze the tabs on the sides, and push to release it from the square hole.
50 kg Accessory Shelf Dimensions:
The adjustable sliding rails on the 50 kg Accessory Shelf allow you to customize the depth from the
minimum of 635mm (25.0 in) when retracted to a maximum of 1045mm (41.14 in) when fully
extended.
Adjust the rails:
To extend the adjustable rails of the shelf:
1. Remove the four (4) M6 x 12 pan head T30
screws from the adjustable rails..
2. Pull the adjustable rails out to the required
depth.
3. Install the four (4) M6 x 12 pan head T30
screws to secure the adjustable rails in
their new location.
Install the 50 kg Accessory Shelf:
Install four (4) cage nuts (provided) to the two front vertical mounting rails as described above. Install
four (4) cage nuts (provided) to the inside of the two rear vertical mounting rails as described above.
At the front of the rack, attach four (4) M6 x 12 pan head T30 screws (provided) to the front of the
shelf and into the four (4) cage nuts you installed in the vertical mounting rails.
At the rear of the rack, install four (4) M6 x 12 pan head T30 screws (provided) to the adjustable rails
on the rear of the shelf and through the four (4) cage nuts installed in the vertical mounting rails. The
illustration below shows this installation process.
ns3209a
Front of rack Rear of rack
The Easy Racks in the illustration above are shown without doors or side panels for clarity.
2 990–91450