GAMDIAS KRATOS E1-600 User Manual
Displayed below is the user manual for KRATOS E1-600 by GAMDIAS which is a product in the Power Supply Units category. This manual has pages.
Related Manuals
STEP by STEP
INSTALLATION
GUIDE
KRATOS e1-600W
Addressable RGB 600W Power Supply
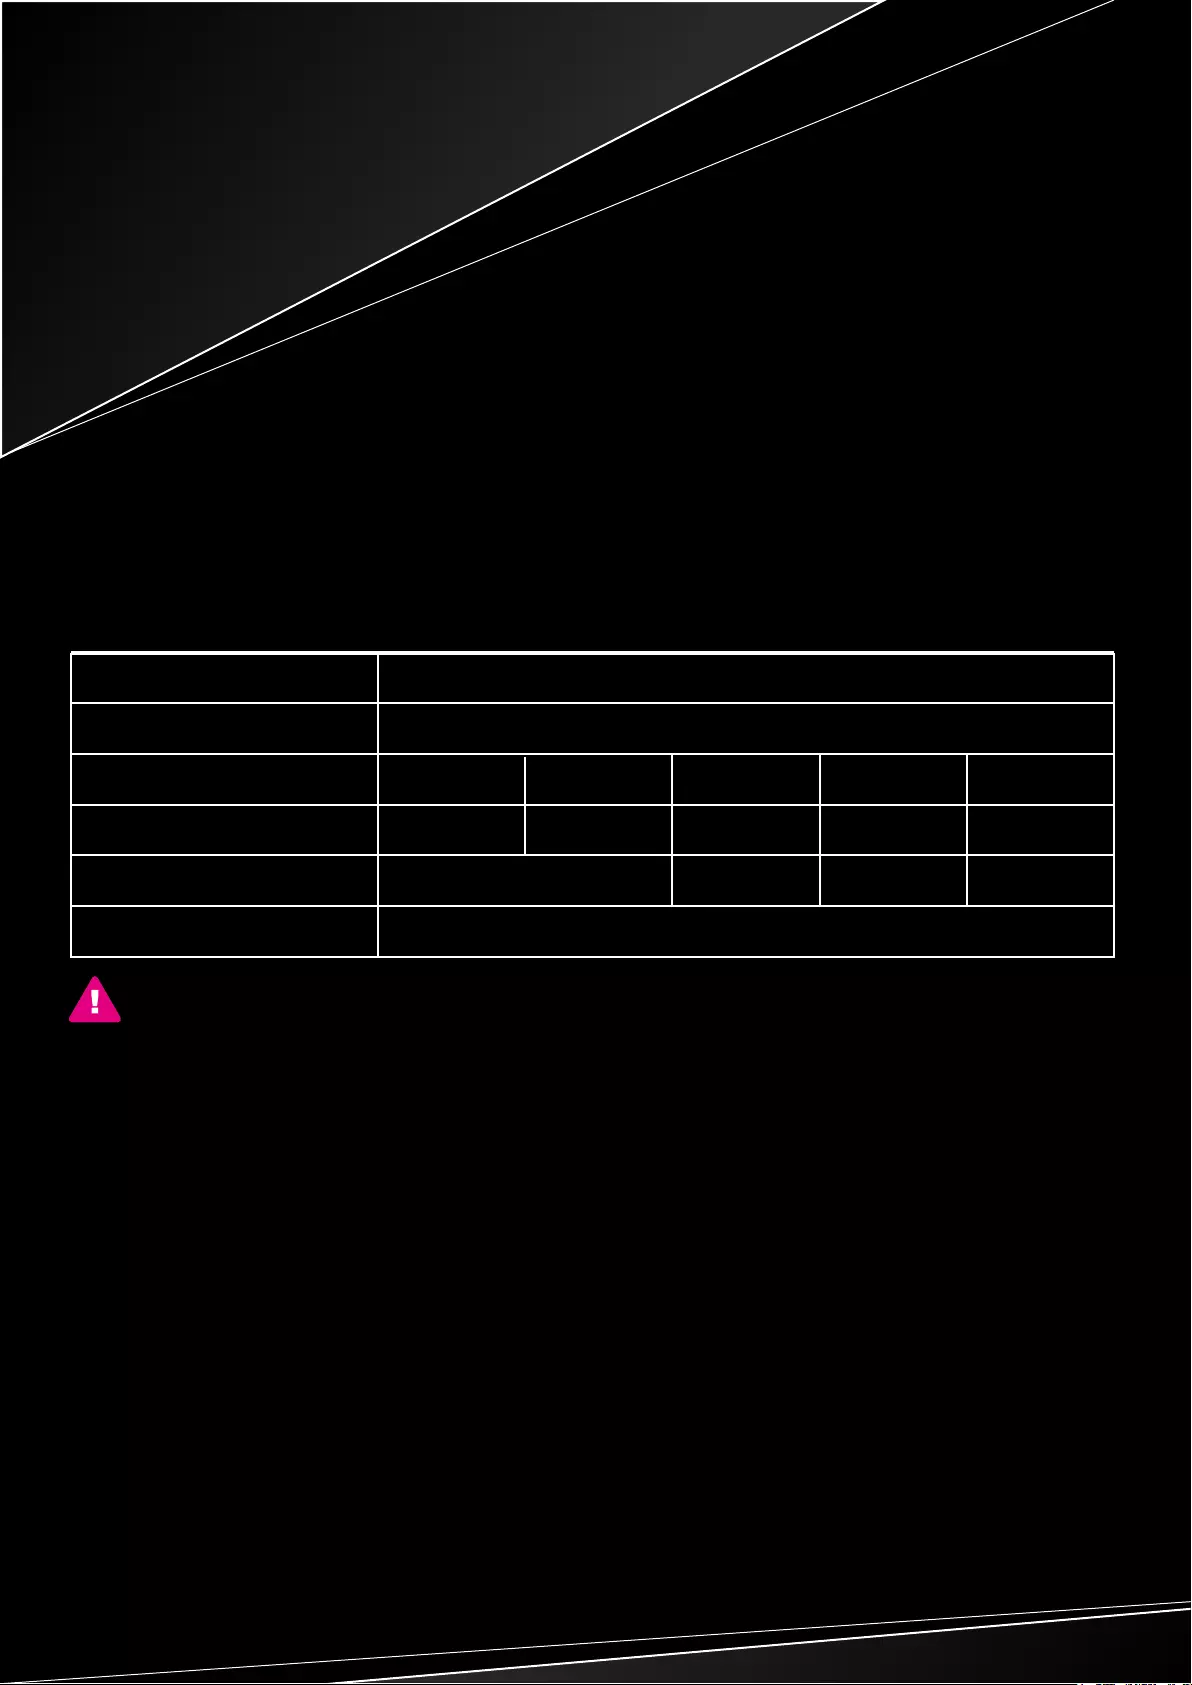
Specifications
KRATOS E1-600 only support AC input voltage 220~240V
Model Name
AC Input
DC Output
Max. Output Current
Max. Output Power
Total Power
KRATOS E1-600
220-240V , 6A , 47-63Hz
+3.3V +5V +12V -12V +5Vsb
15A 15A 40.5A 0.3A 2.5A
100W 486W 3.6W 12.5W
600W
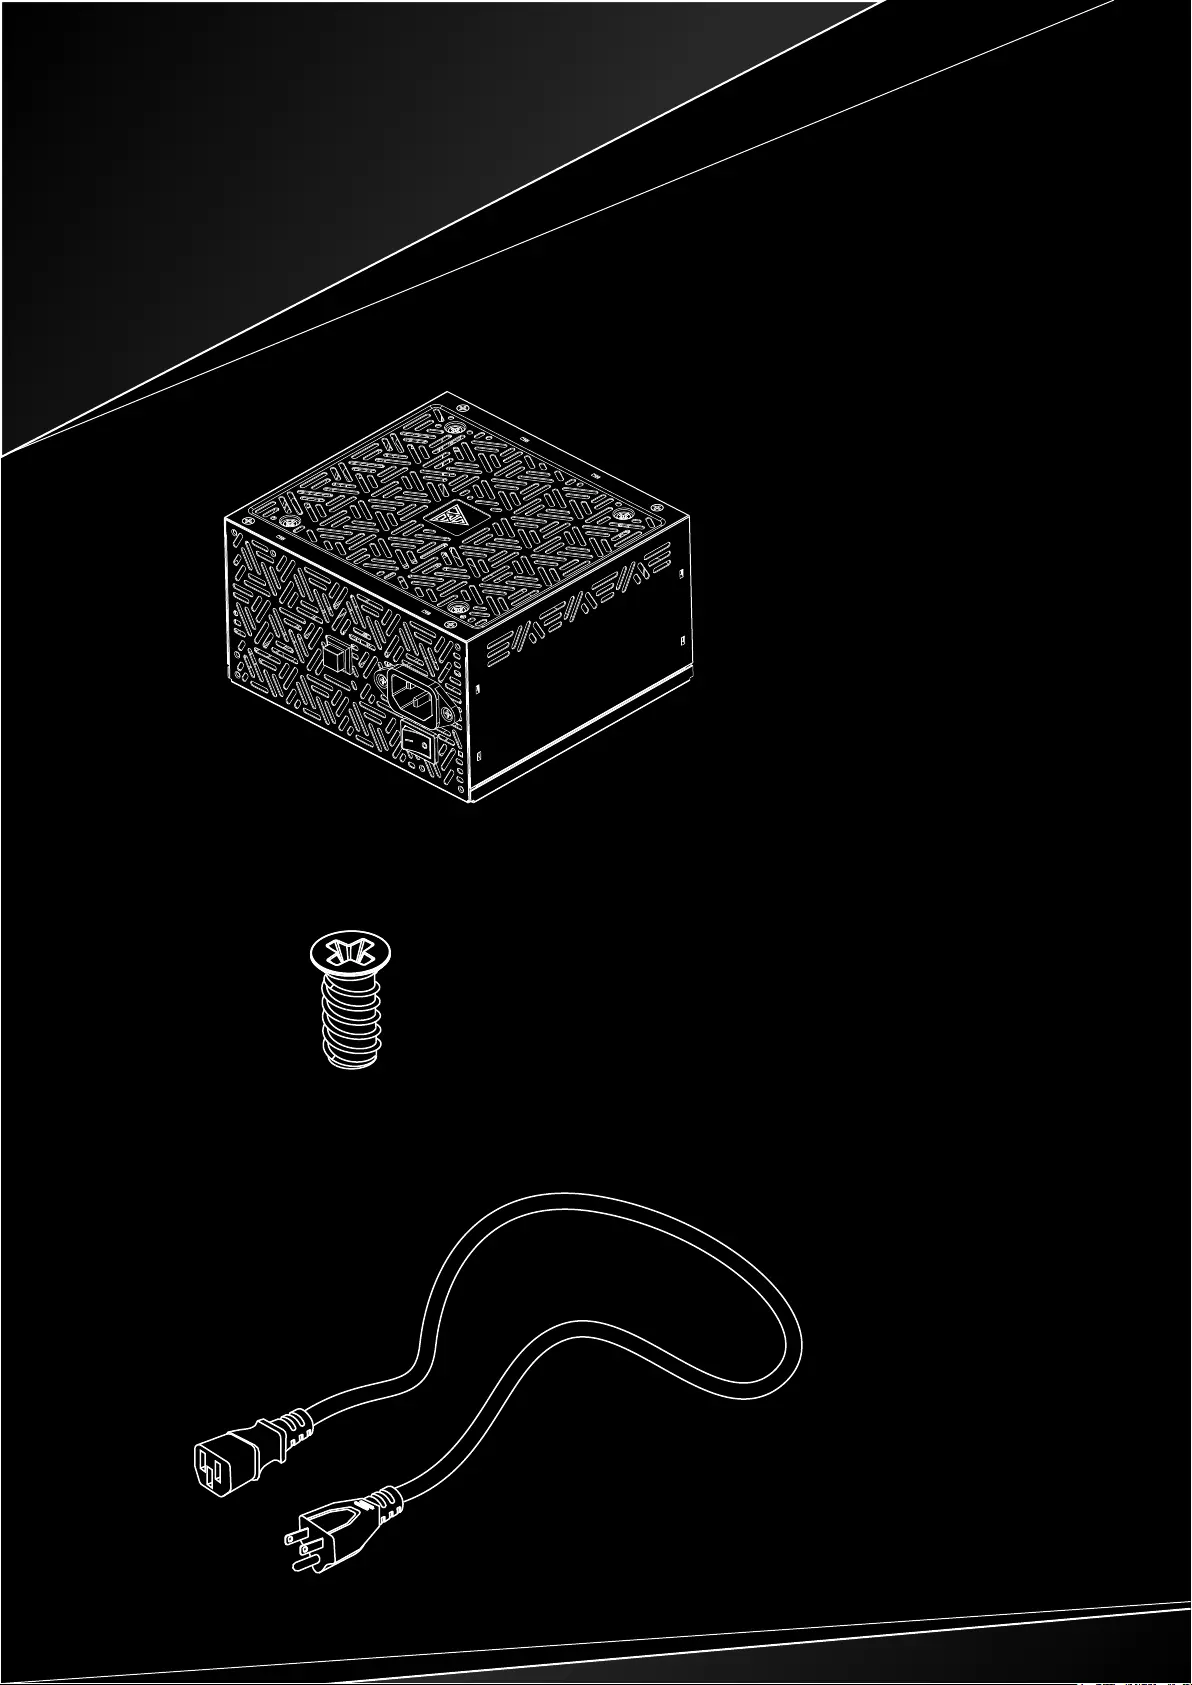
Package Contents
A
B
c
x1
x1
x4
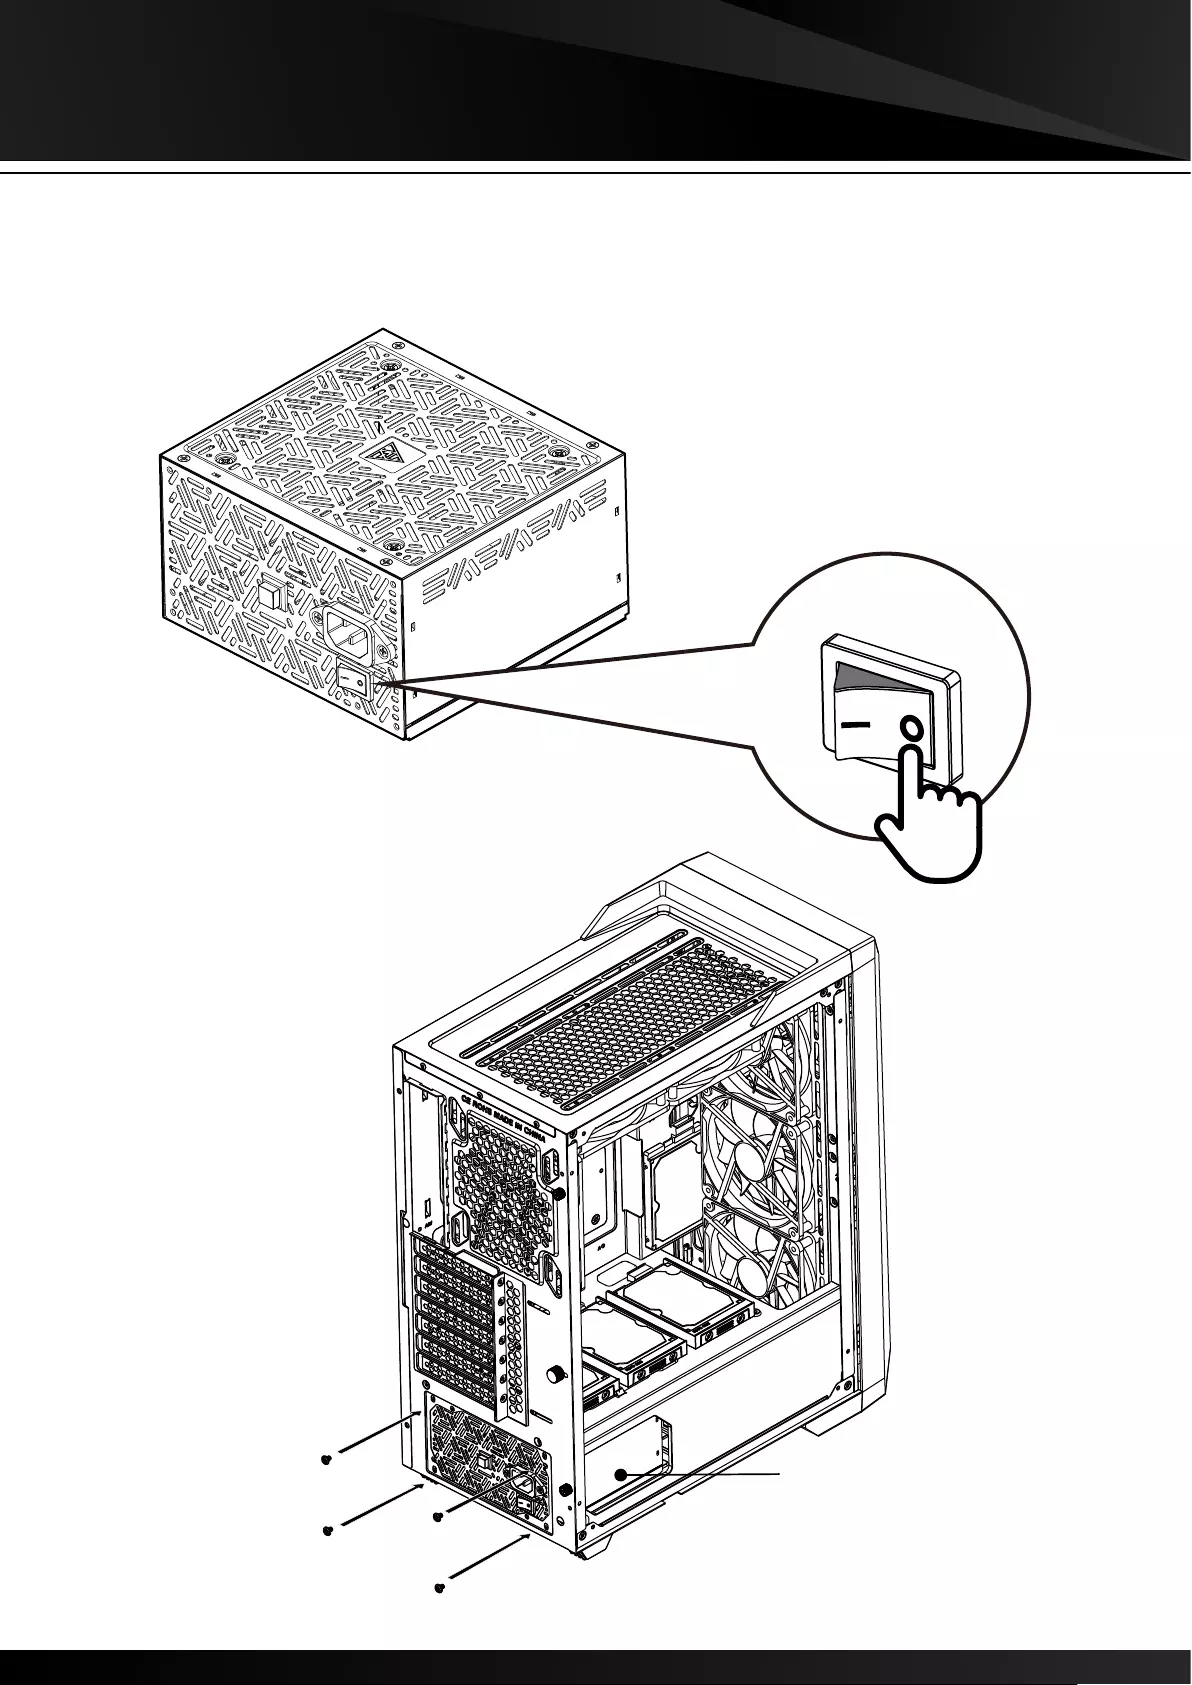
1
2
Turn off the PSU before installing by pushing I/O switch to “O" position.
A
A
B
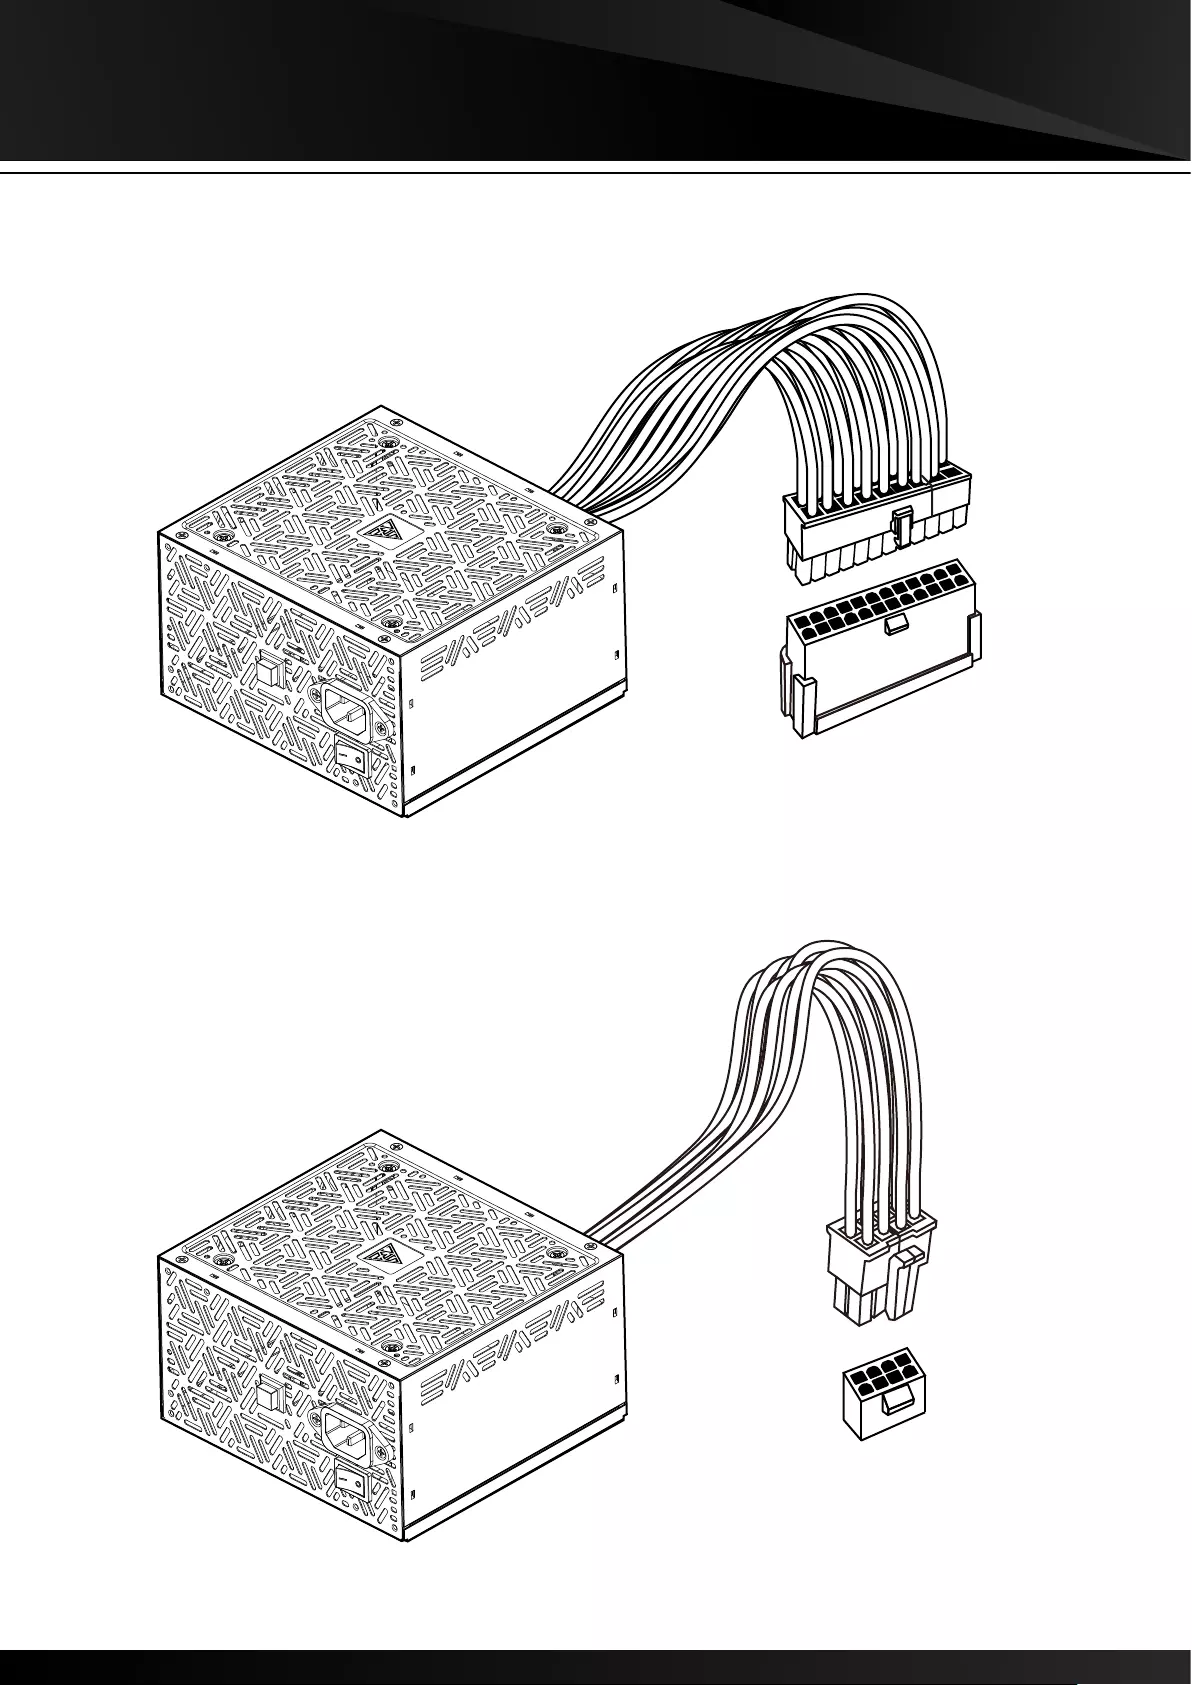
3
4
A
A
Motherboard
CPU
A
A
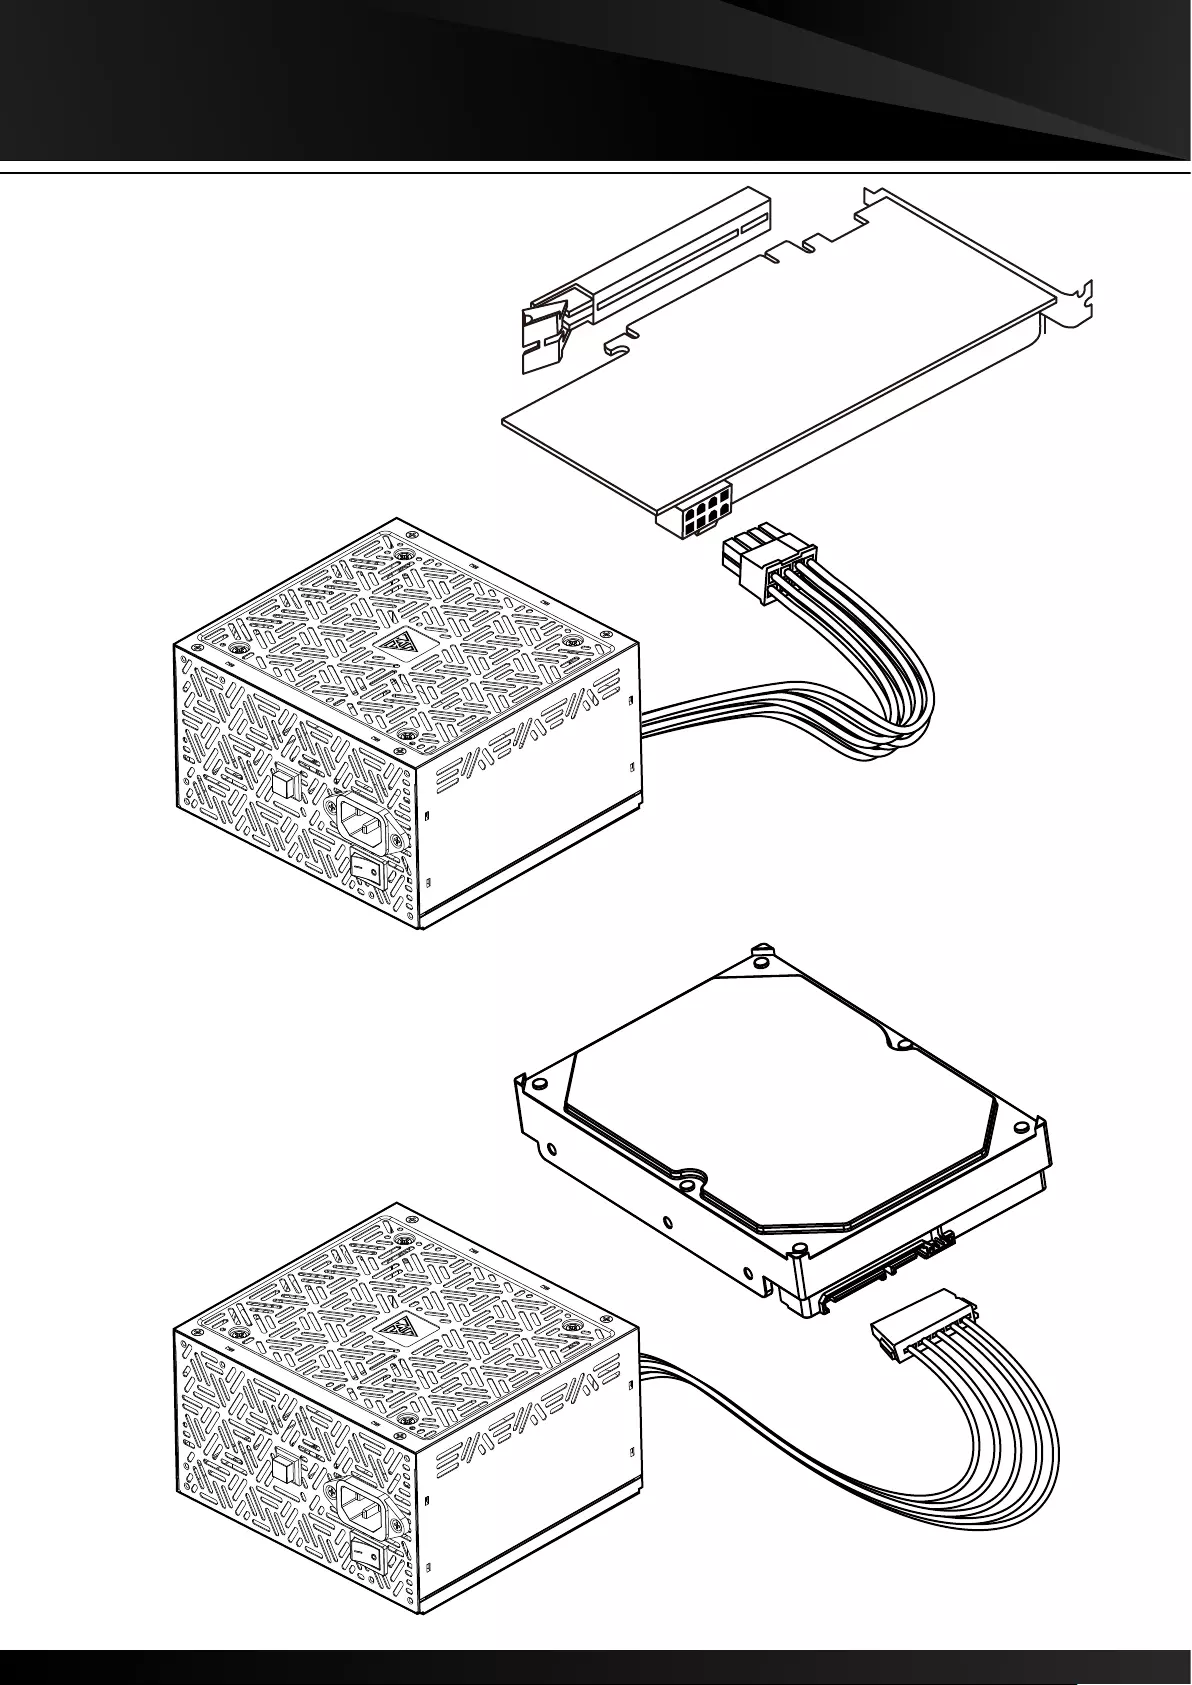
6
5PCIE
SATA

A
A
8
7Molex
FDD
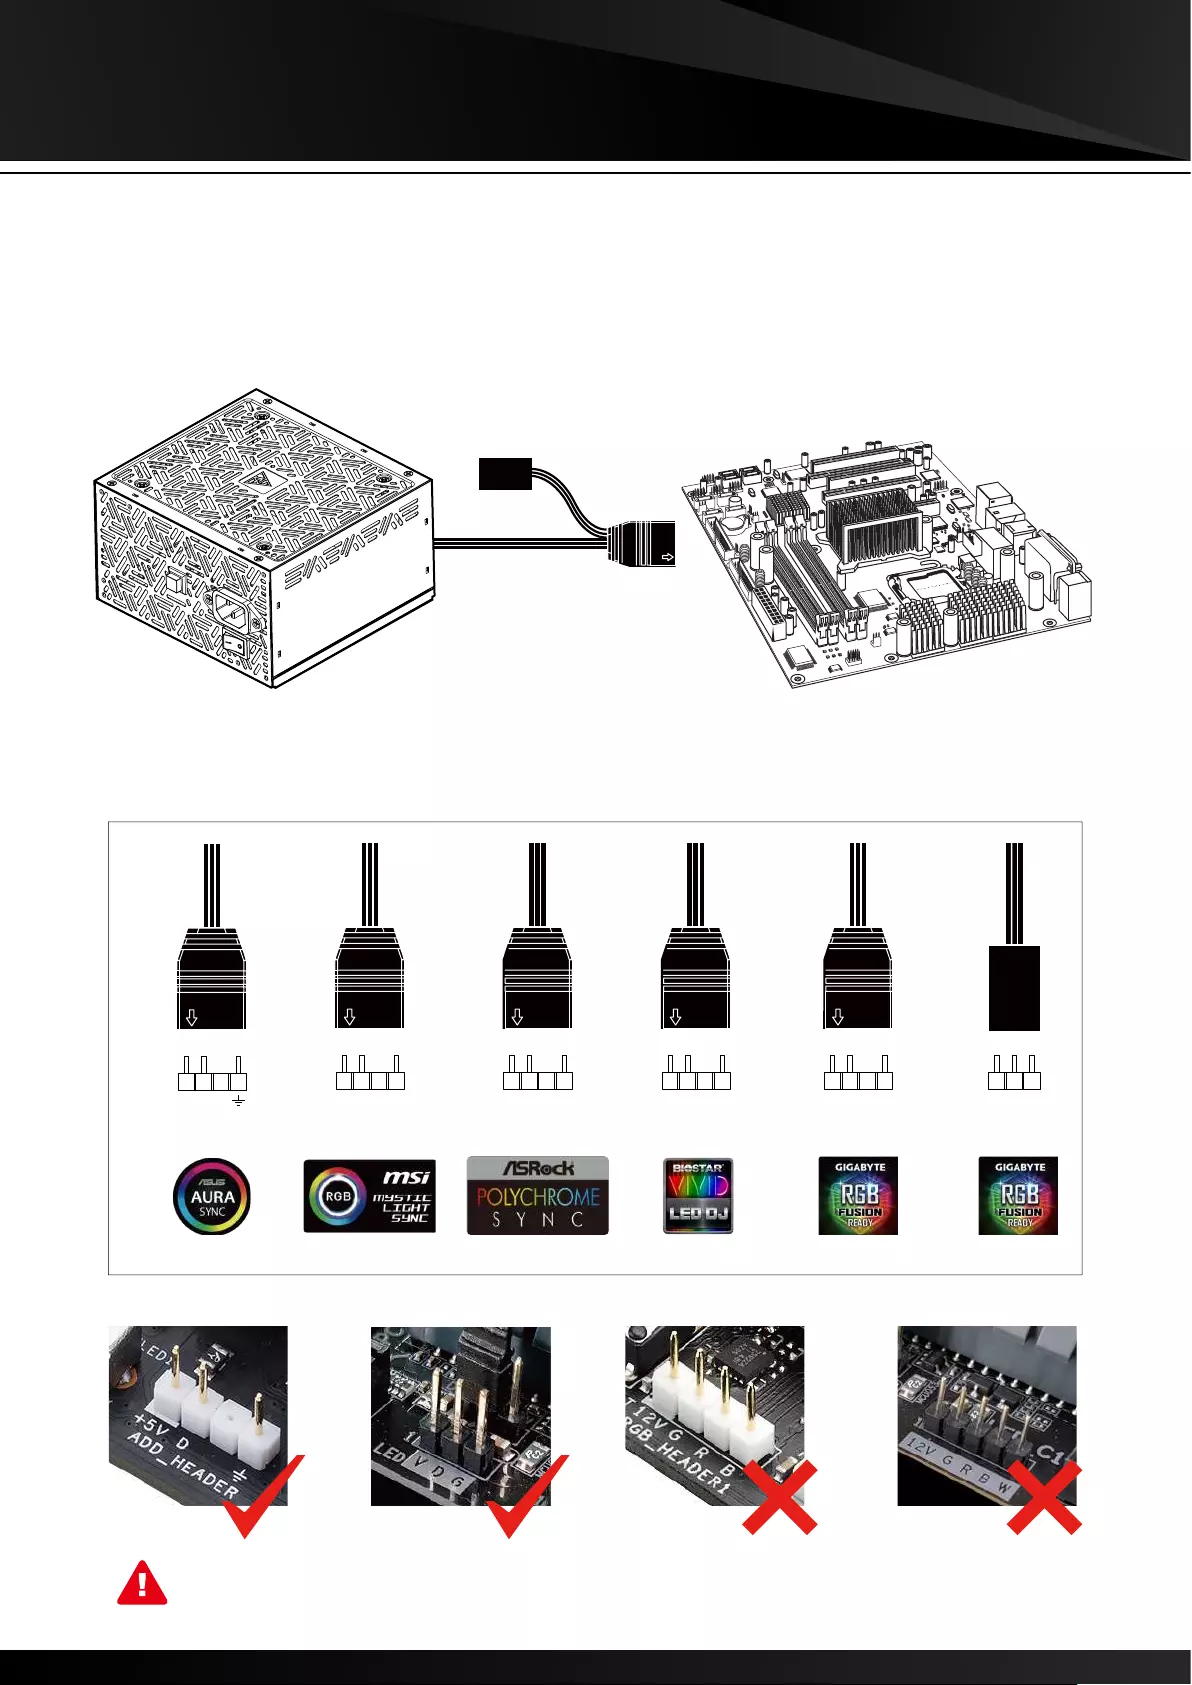
VDG
A
9
KRATOS E1-600 only support 5V addressable (digital) RGB header
If your motherboard has 5V 3-Pin addressable (digital) RGB
header, you can customize RGB lighting via motherboard manu-
facture sync software.
+5V D
ADD_HEADER
+5V D - G
JRAINBOW ADDR_LED v d g VDG
VDG
5v d gnd
5V_LED
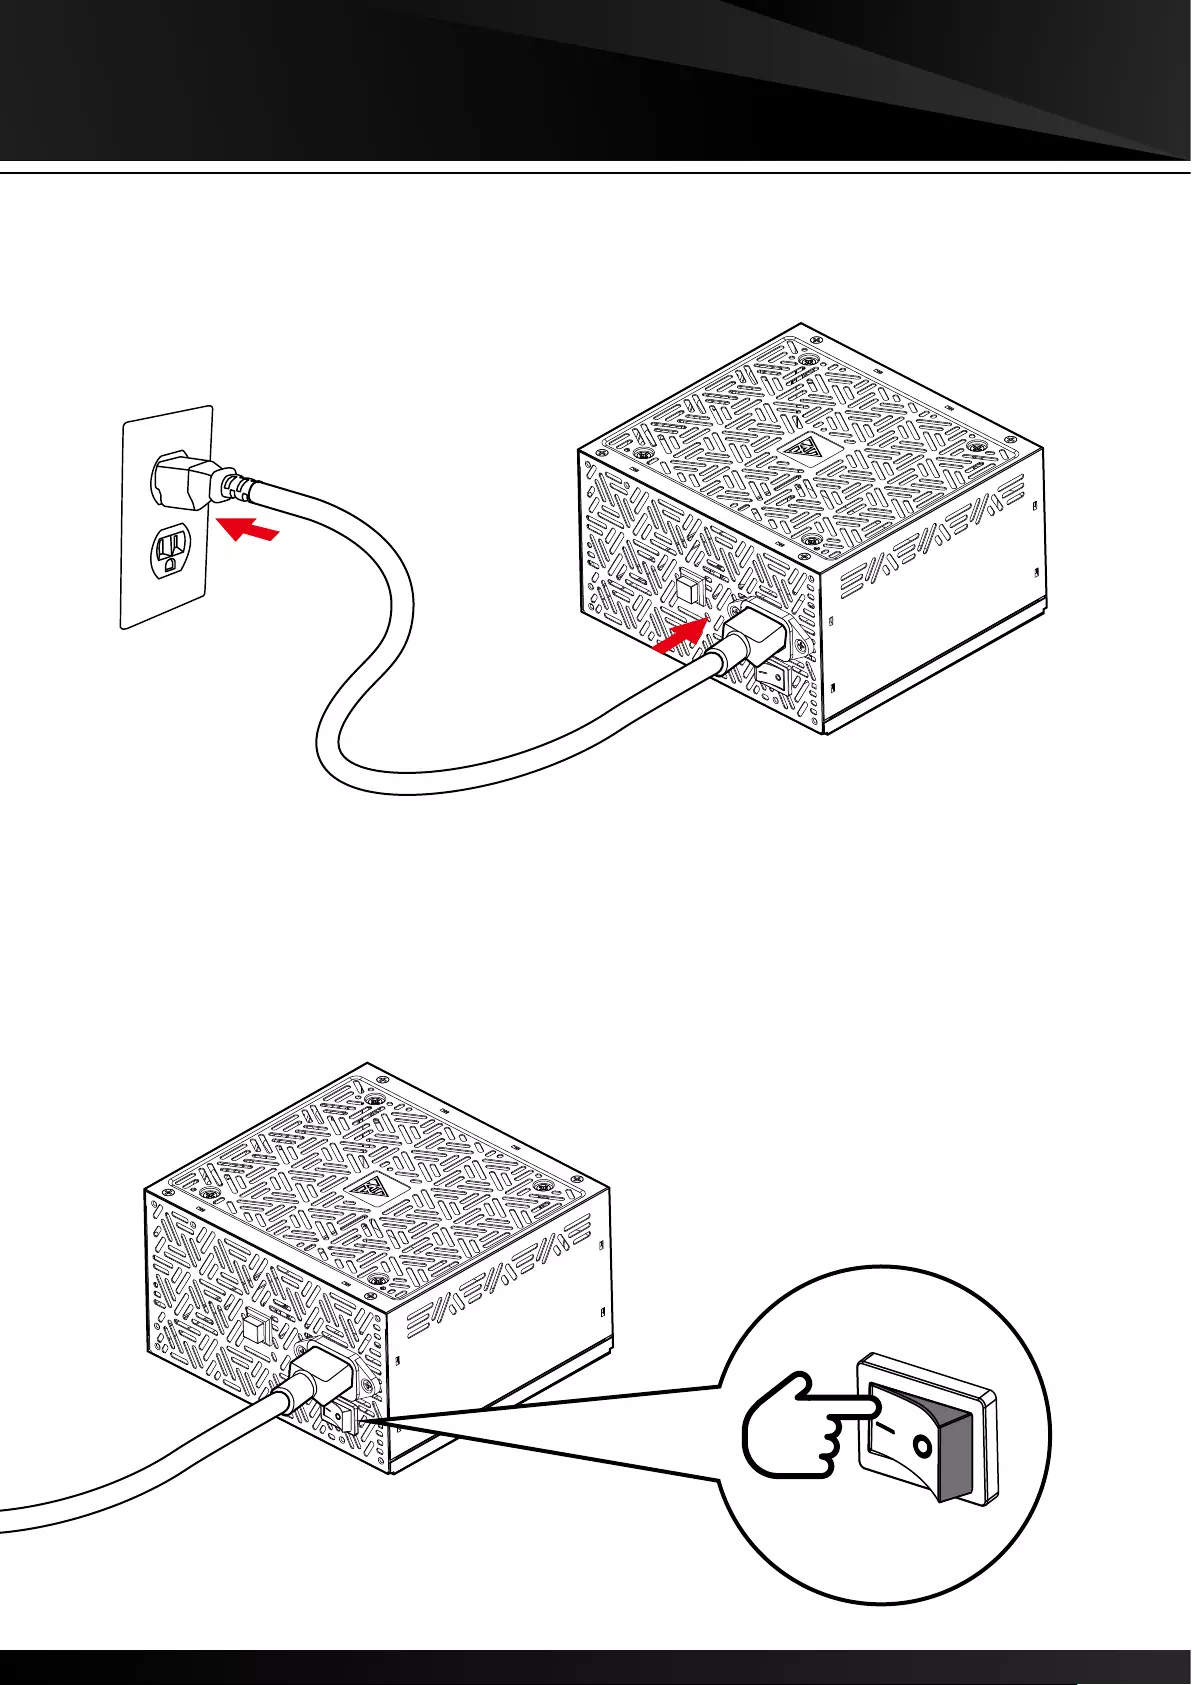
A
C
A
10
11 Turn on the PSU after installing by pushing I/O switch
to "I" position.

A
3 sec
Built-in Effects
MB Sync
By long pressing the button for 3 seconds, easily switch
between motherboard manufacture sync and the built-in 30
lighting effects .
12
RGB LIGHTING